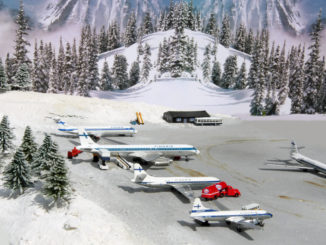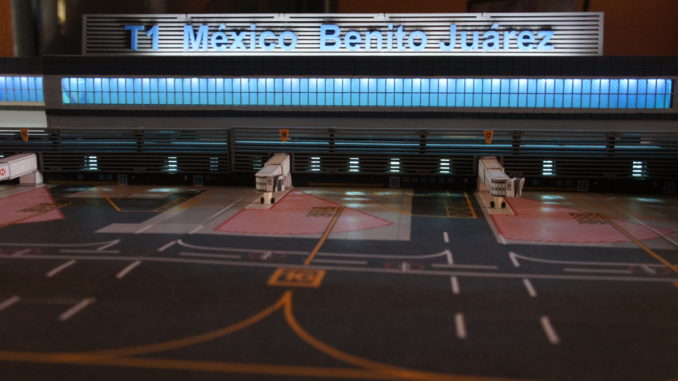
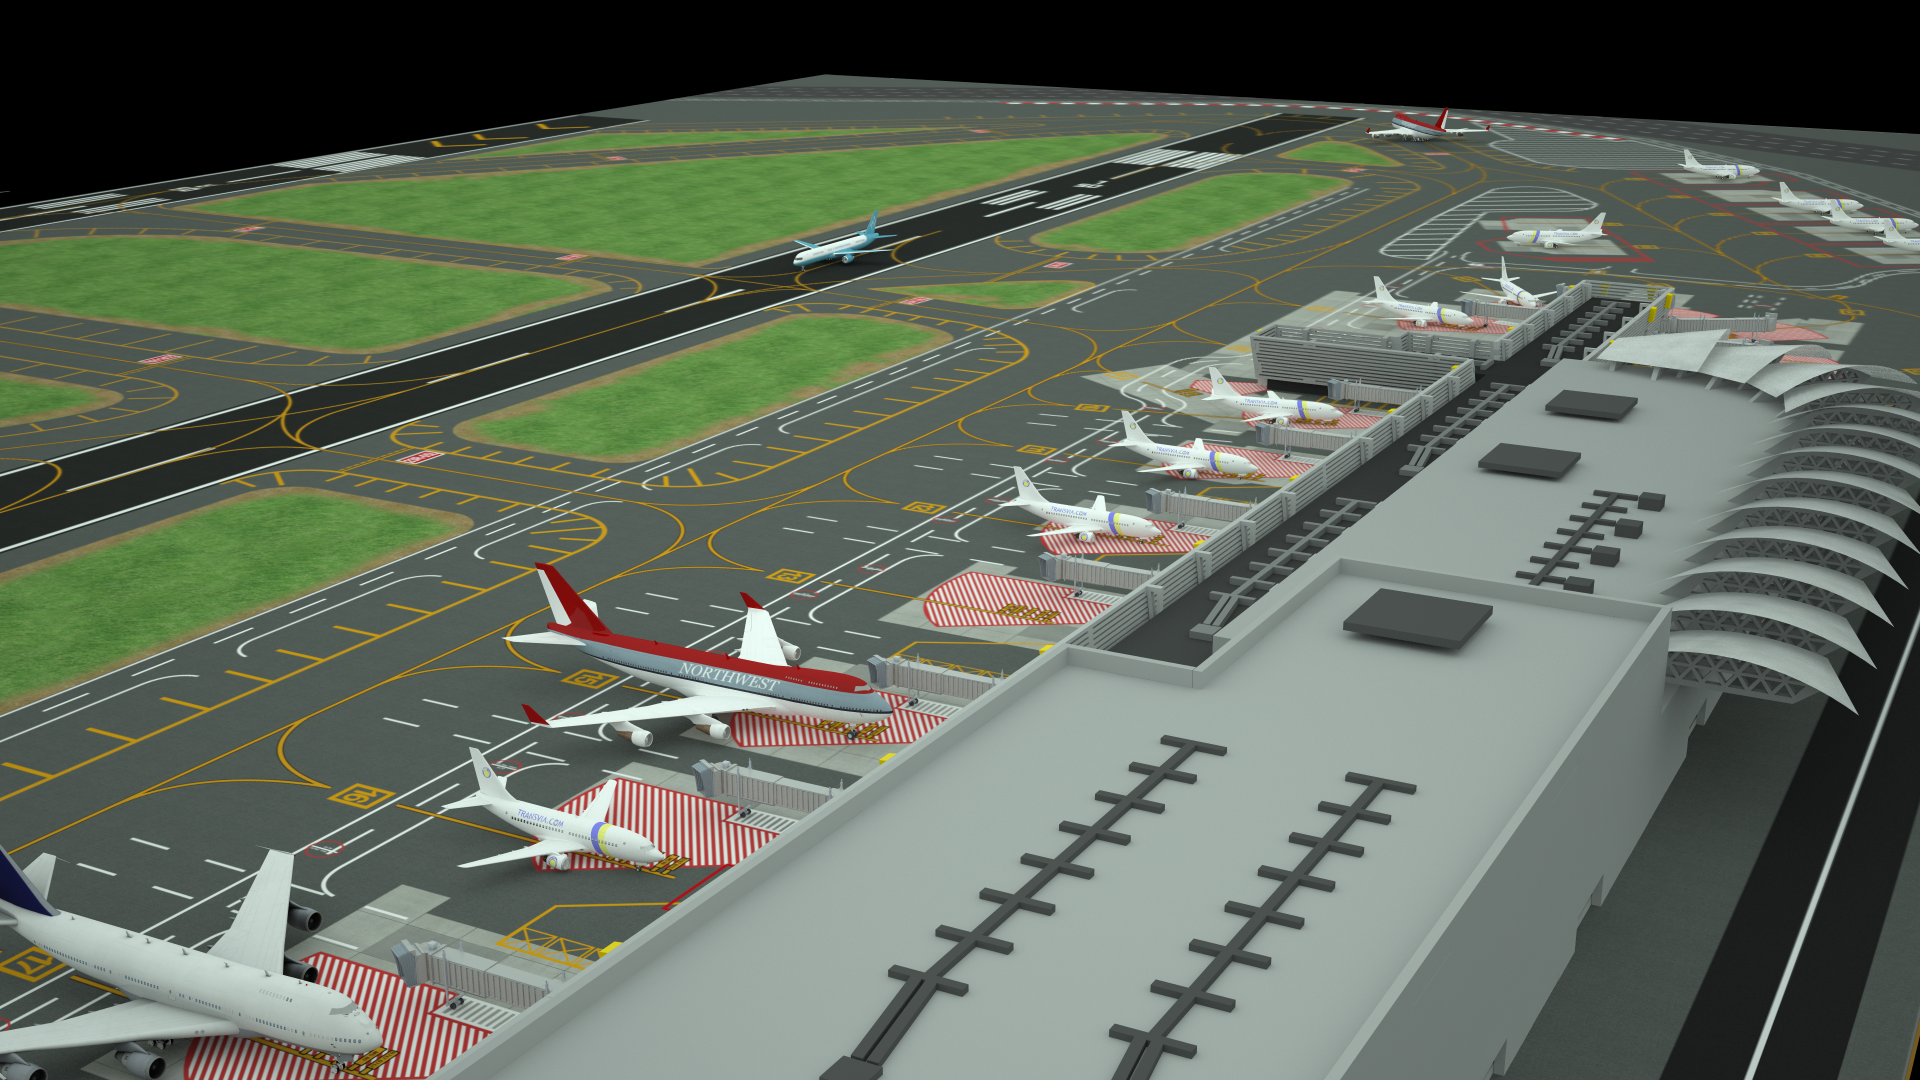
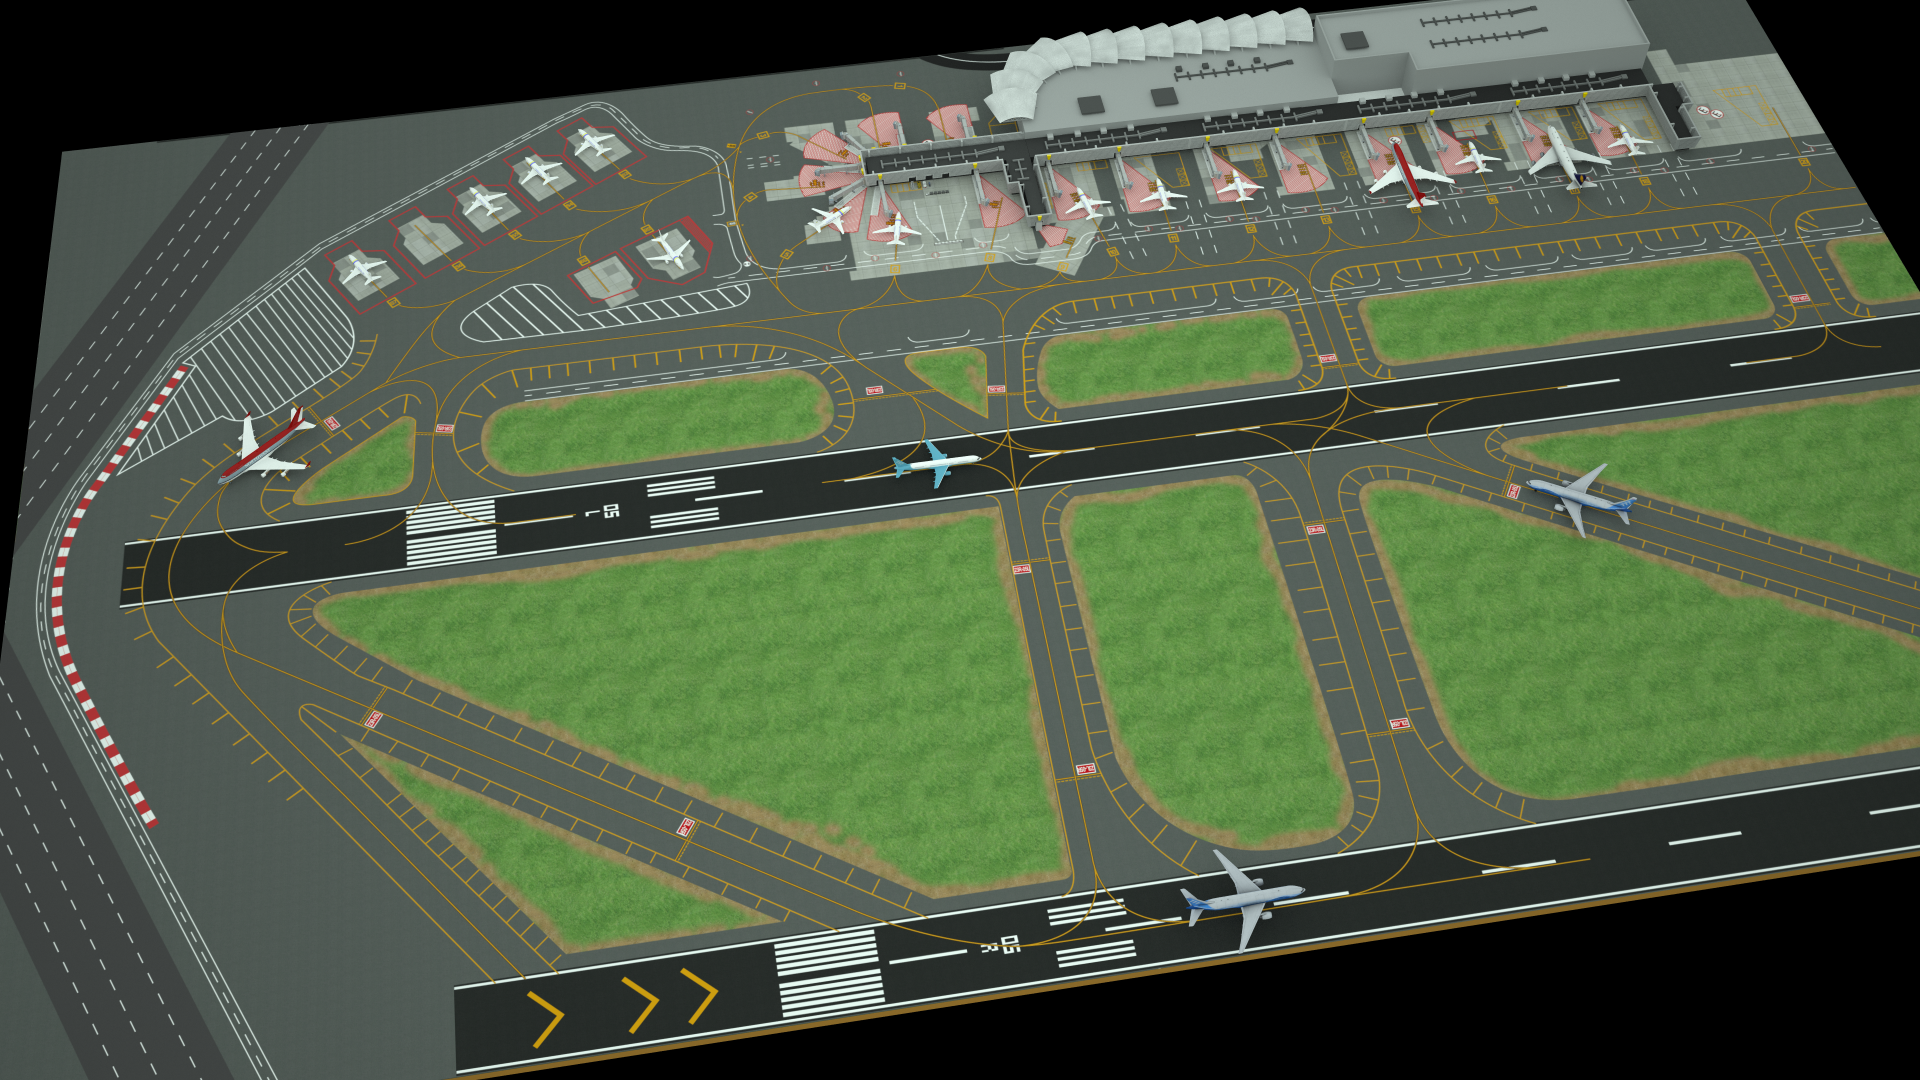
We sit down with Model Airliner Magazine Contributor Daniel Dominguez as he provides his insight on how he and his close friend Andres Glass created a model rendition of Mexico City’s Benito Juárez International Airport. The impressive diorama features parking stands for 18 aircraft, LED lighting and incorporates 1/400 and 1/200 scale features.
Current Location: Mexico City
Diorama: Benito Juárez International Airport
MAM = Model Airliner Magazine | DD = Daniel Dominguez
MAM: When did you come up with the idea to design a rendition of Mexico City International Airport?
DD: I was a member of several spotting groups in Mexico City, and I wanted to share my passion for dioramas by creating an airport layout. I contacted my friend Andres, a designer, and we started the project.
MAM: What is your favorite airport?
DD: Los Angeles International Airport.
MAM: What scale is your airport?
DD: Primarily 1/400 scale, however we have a small 1/200 scale section.
MAM: How many aircraft parking gates are part of your layout?
DD: 18 gates.
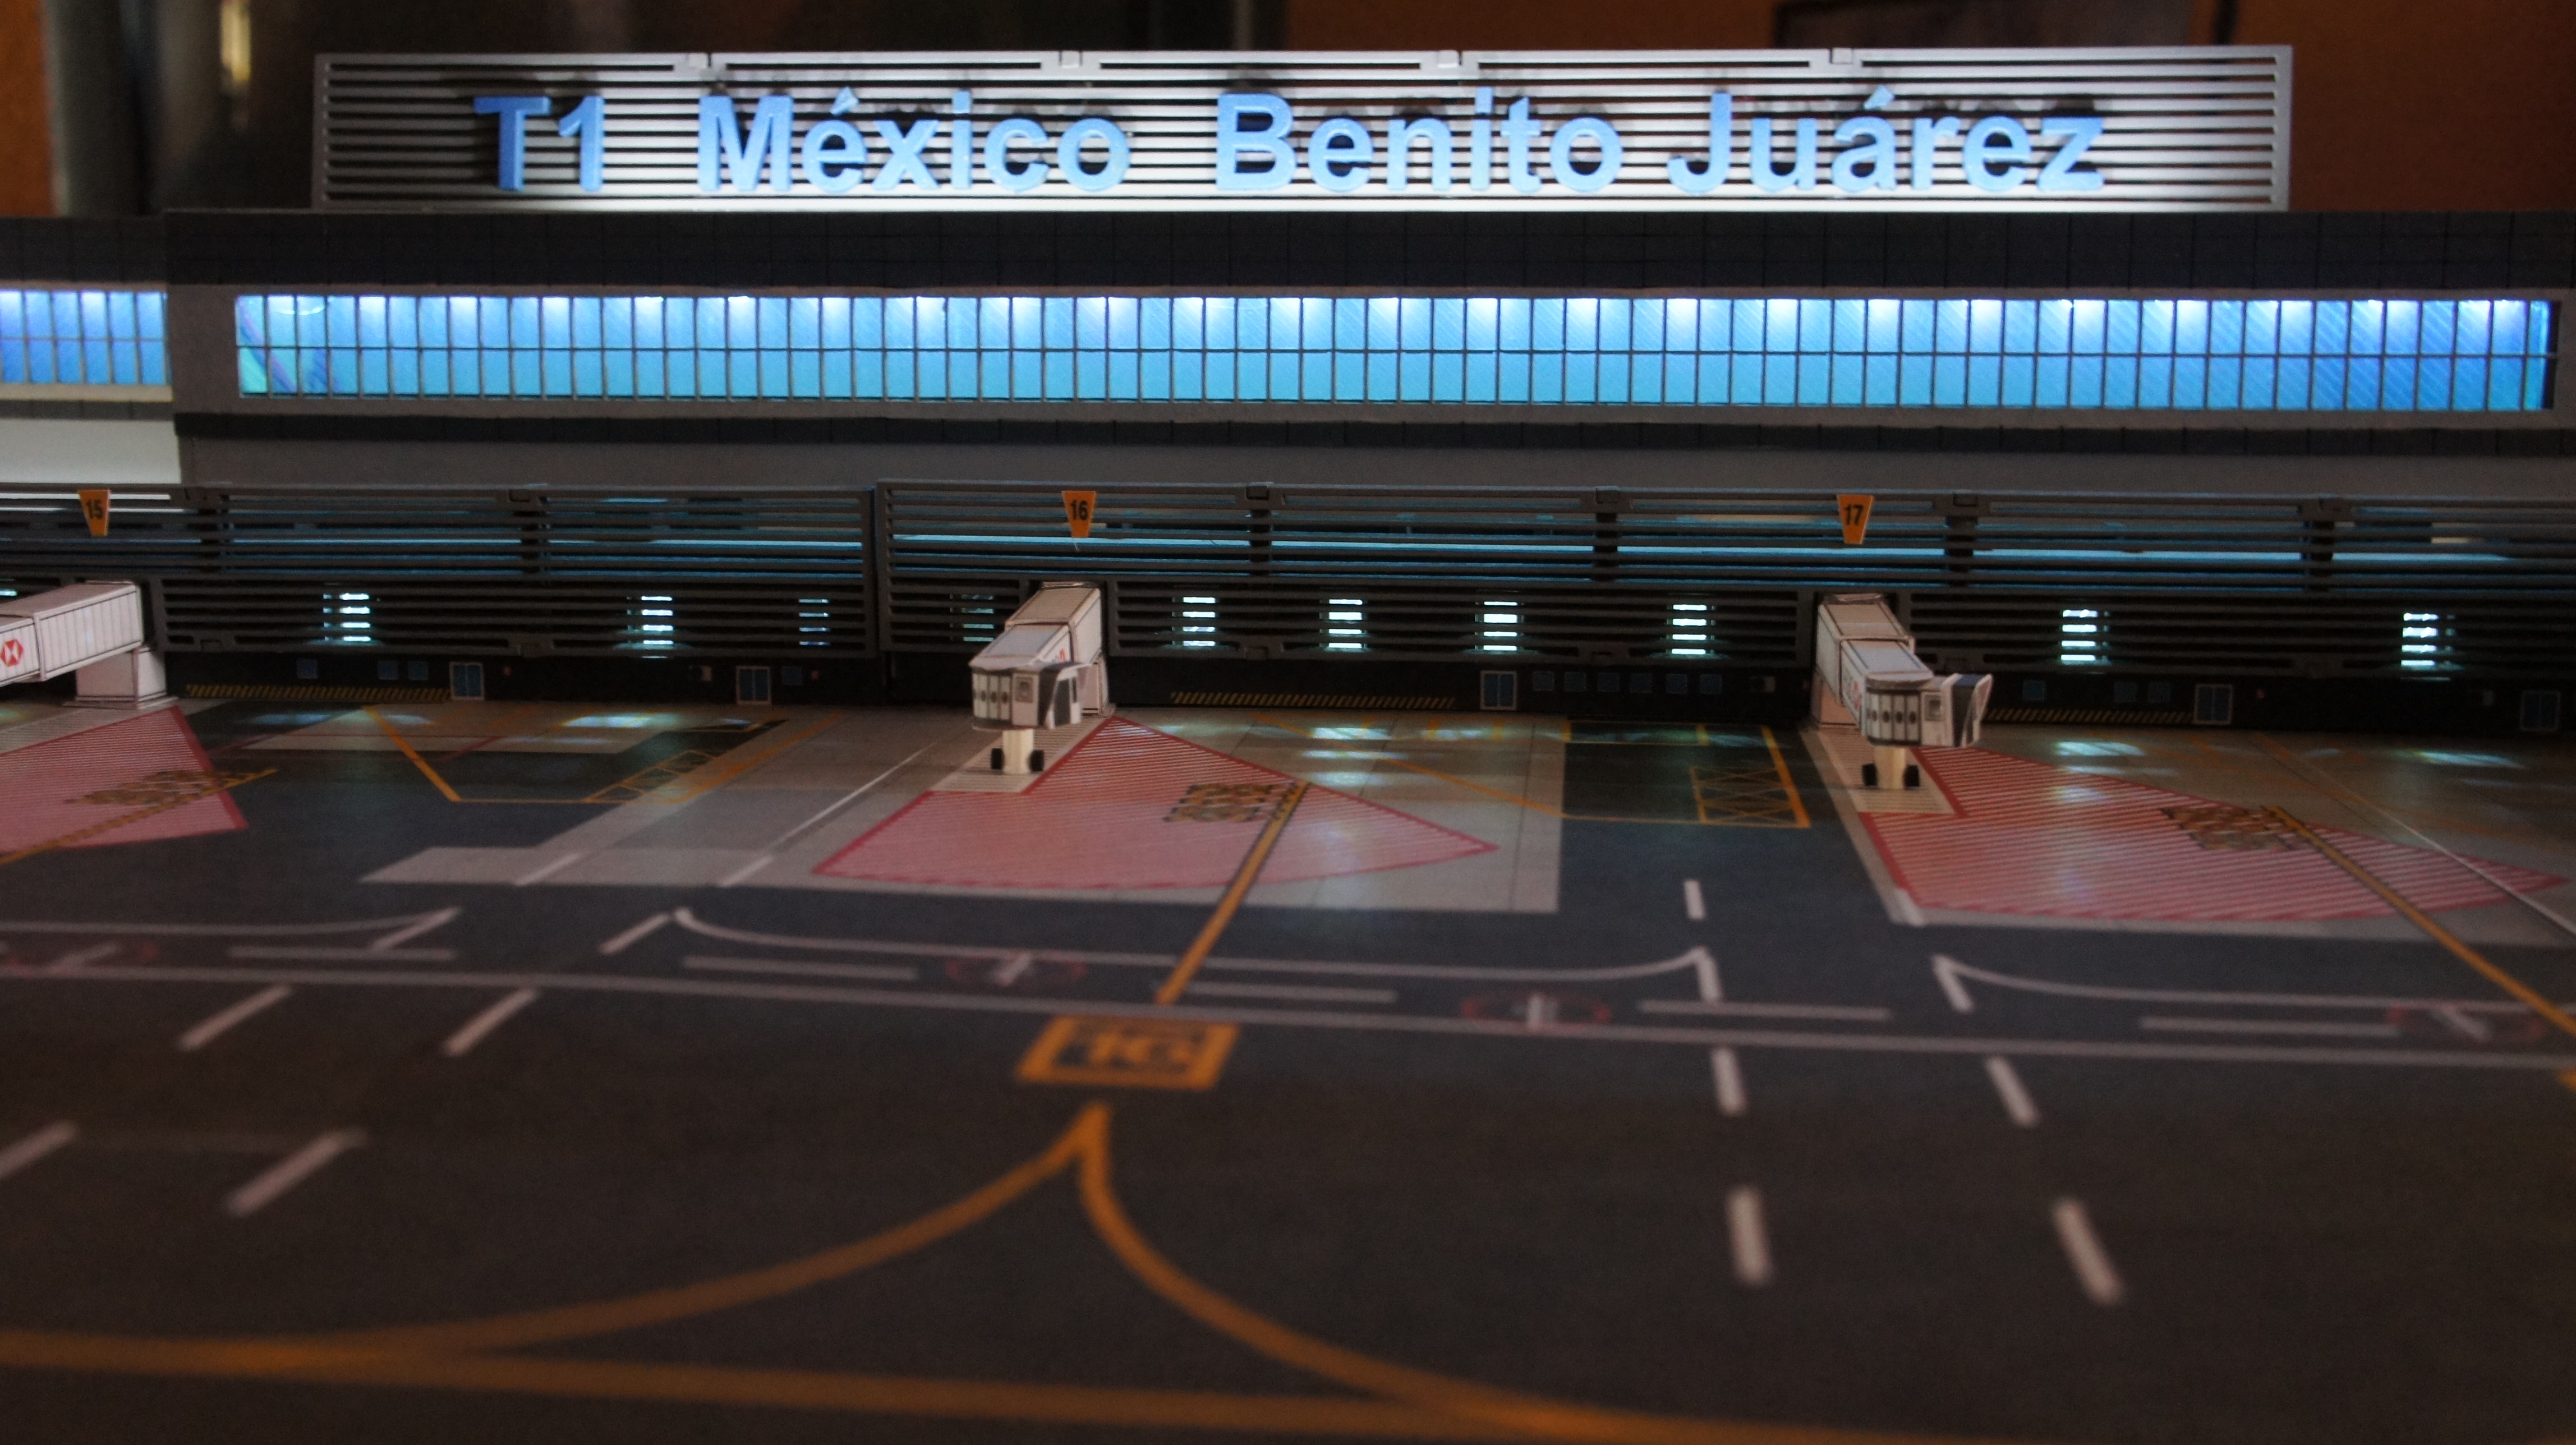
MAM: How did you create the night lighting effects for the airport?
DD: We created it with special LED bands.
MAM: What different types of products did you use in the development and creation of your layout?
DD: We utilized a foil to make the runways and taxiways, as well as wood with a 3D design.
MAM: Can you tell us how you designed and constructed the Mexico City International Airport?
DD: For the design of this airport we used real life and satellite photographs with the help of Google Maps. This allowed us to recreate the actual taxiways, gates, and building structures. We used vector drawings to create 3D models for testing mainly as a prototype before production. Adobe Illustrator, Google Earth and Studio 3D Max were used in the terminal design process.
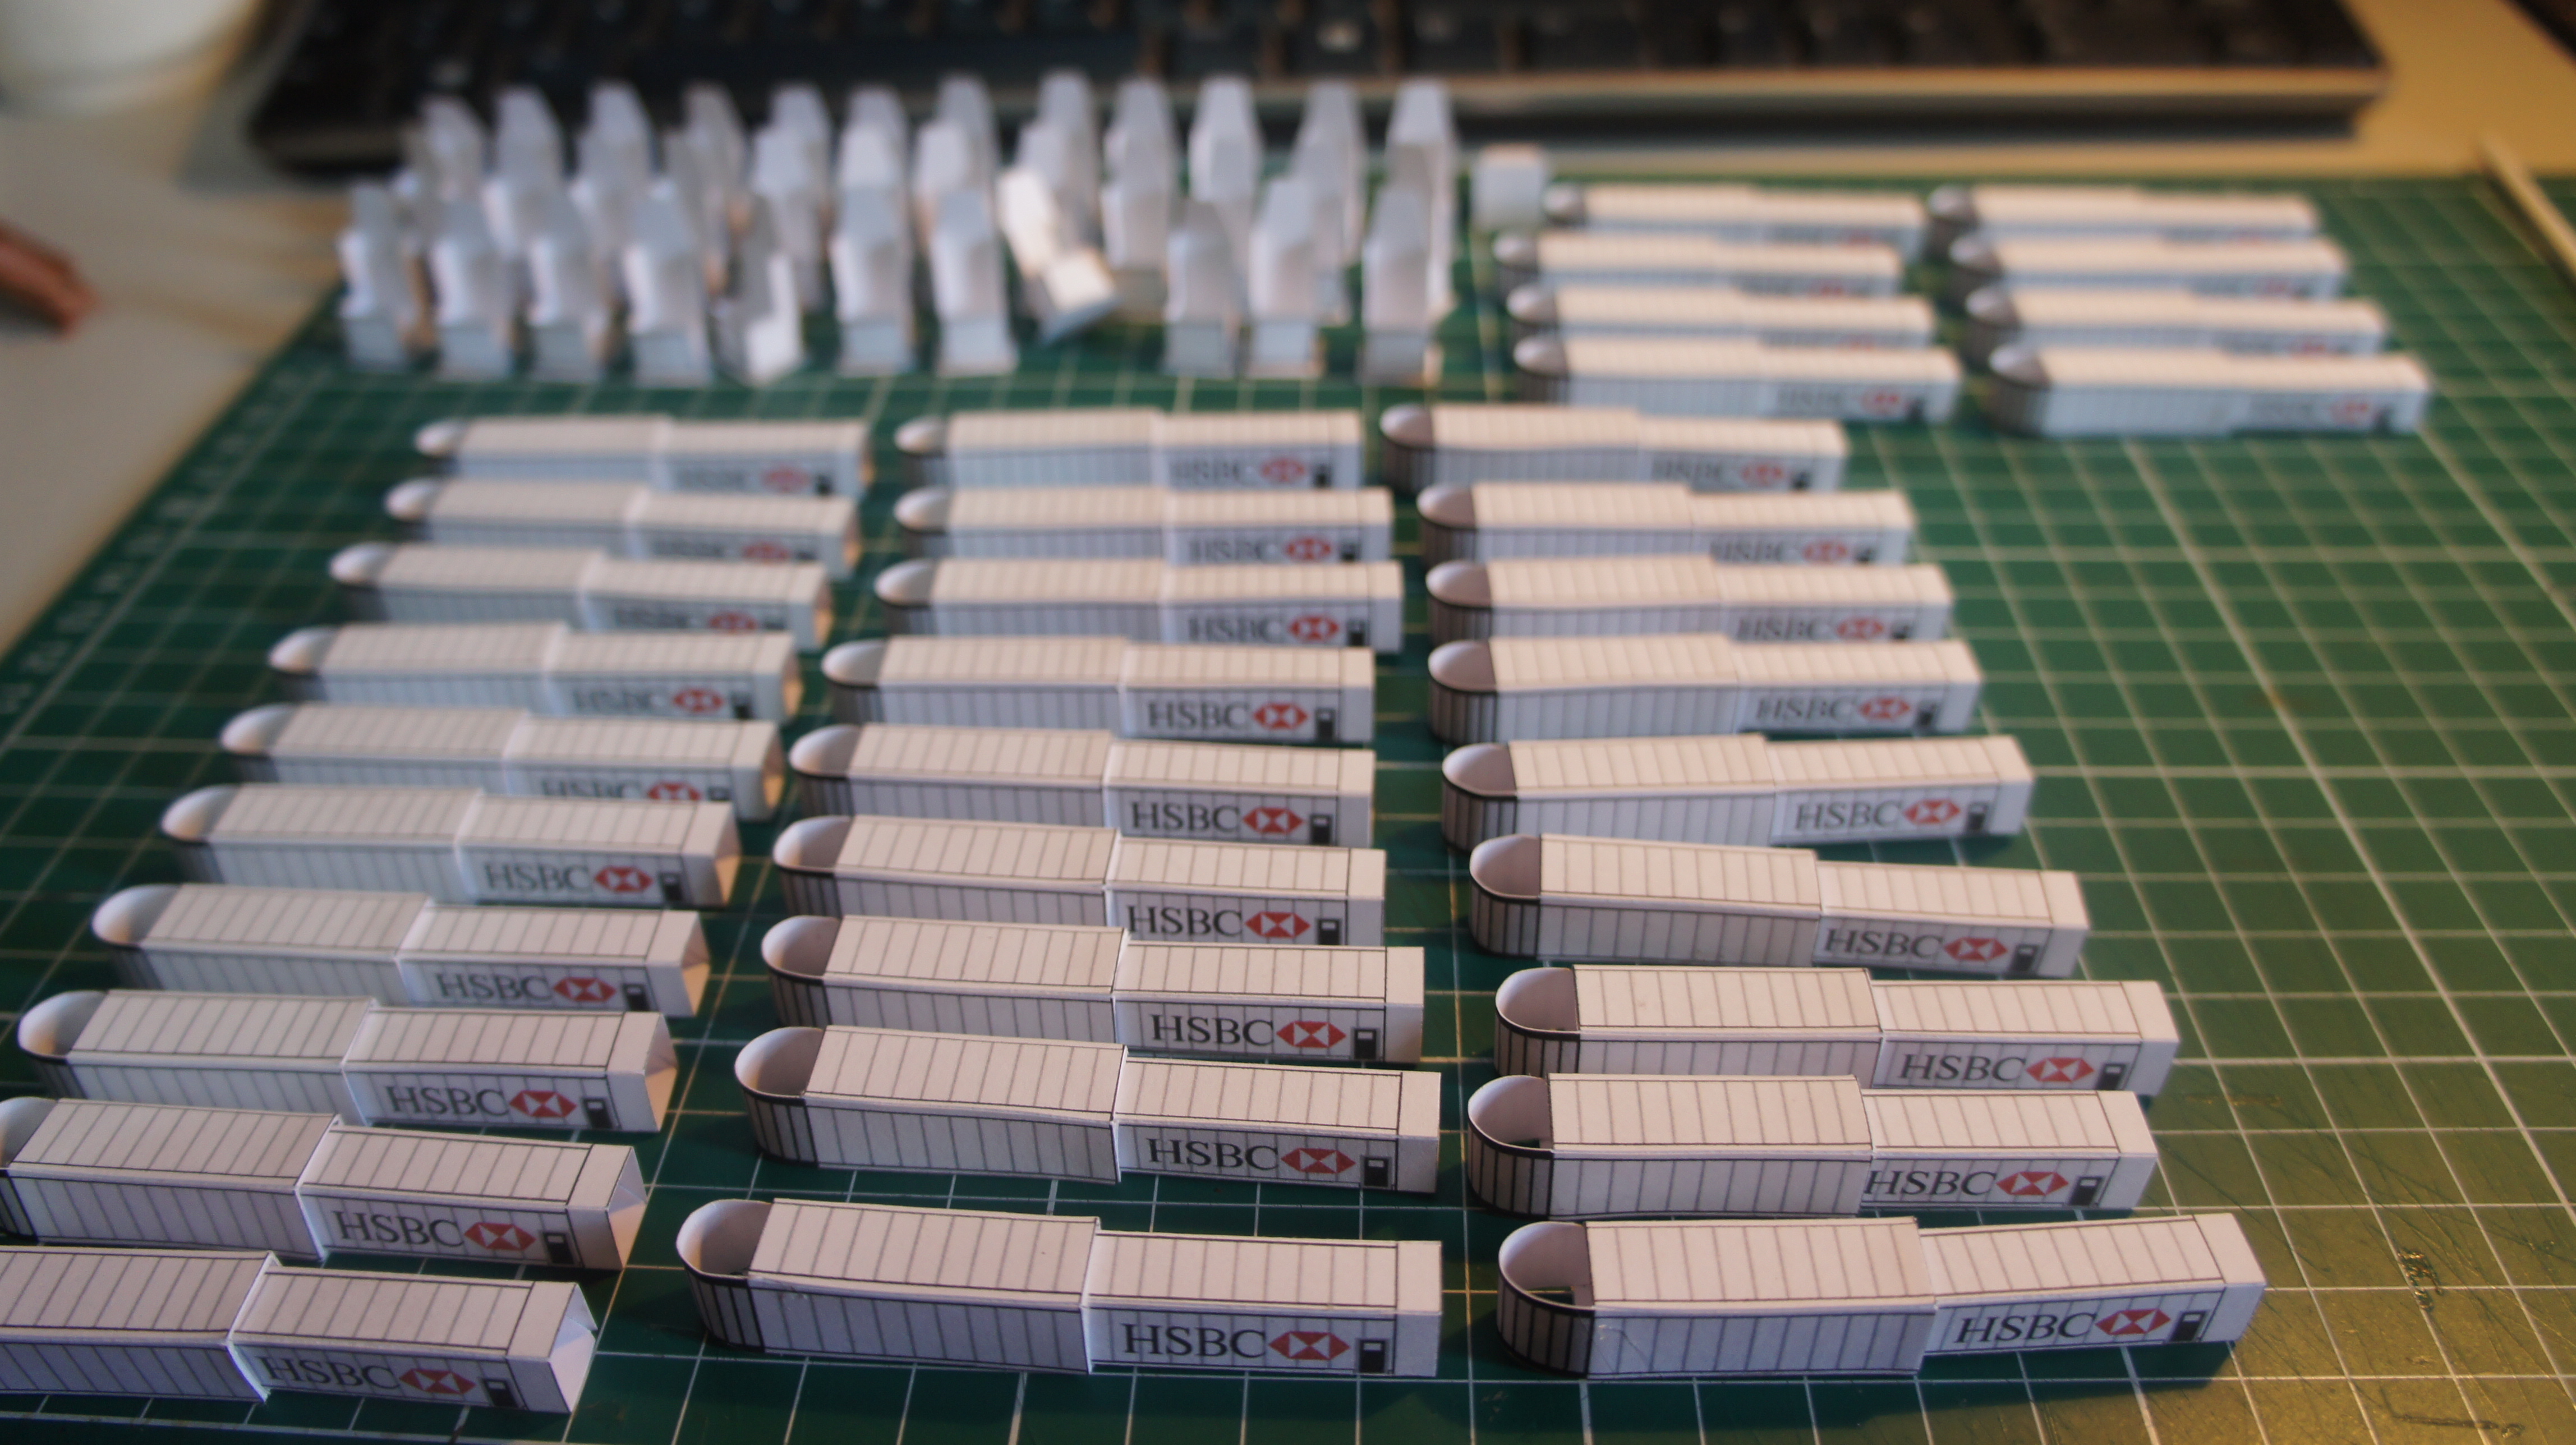
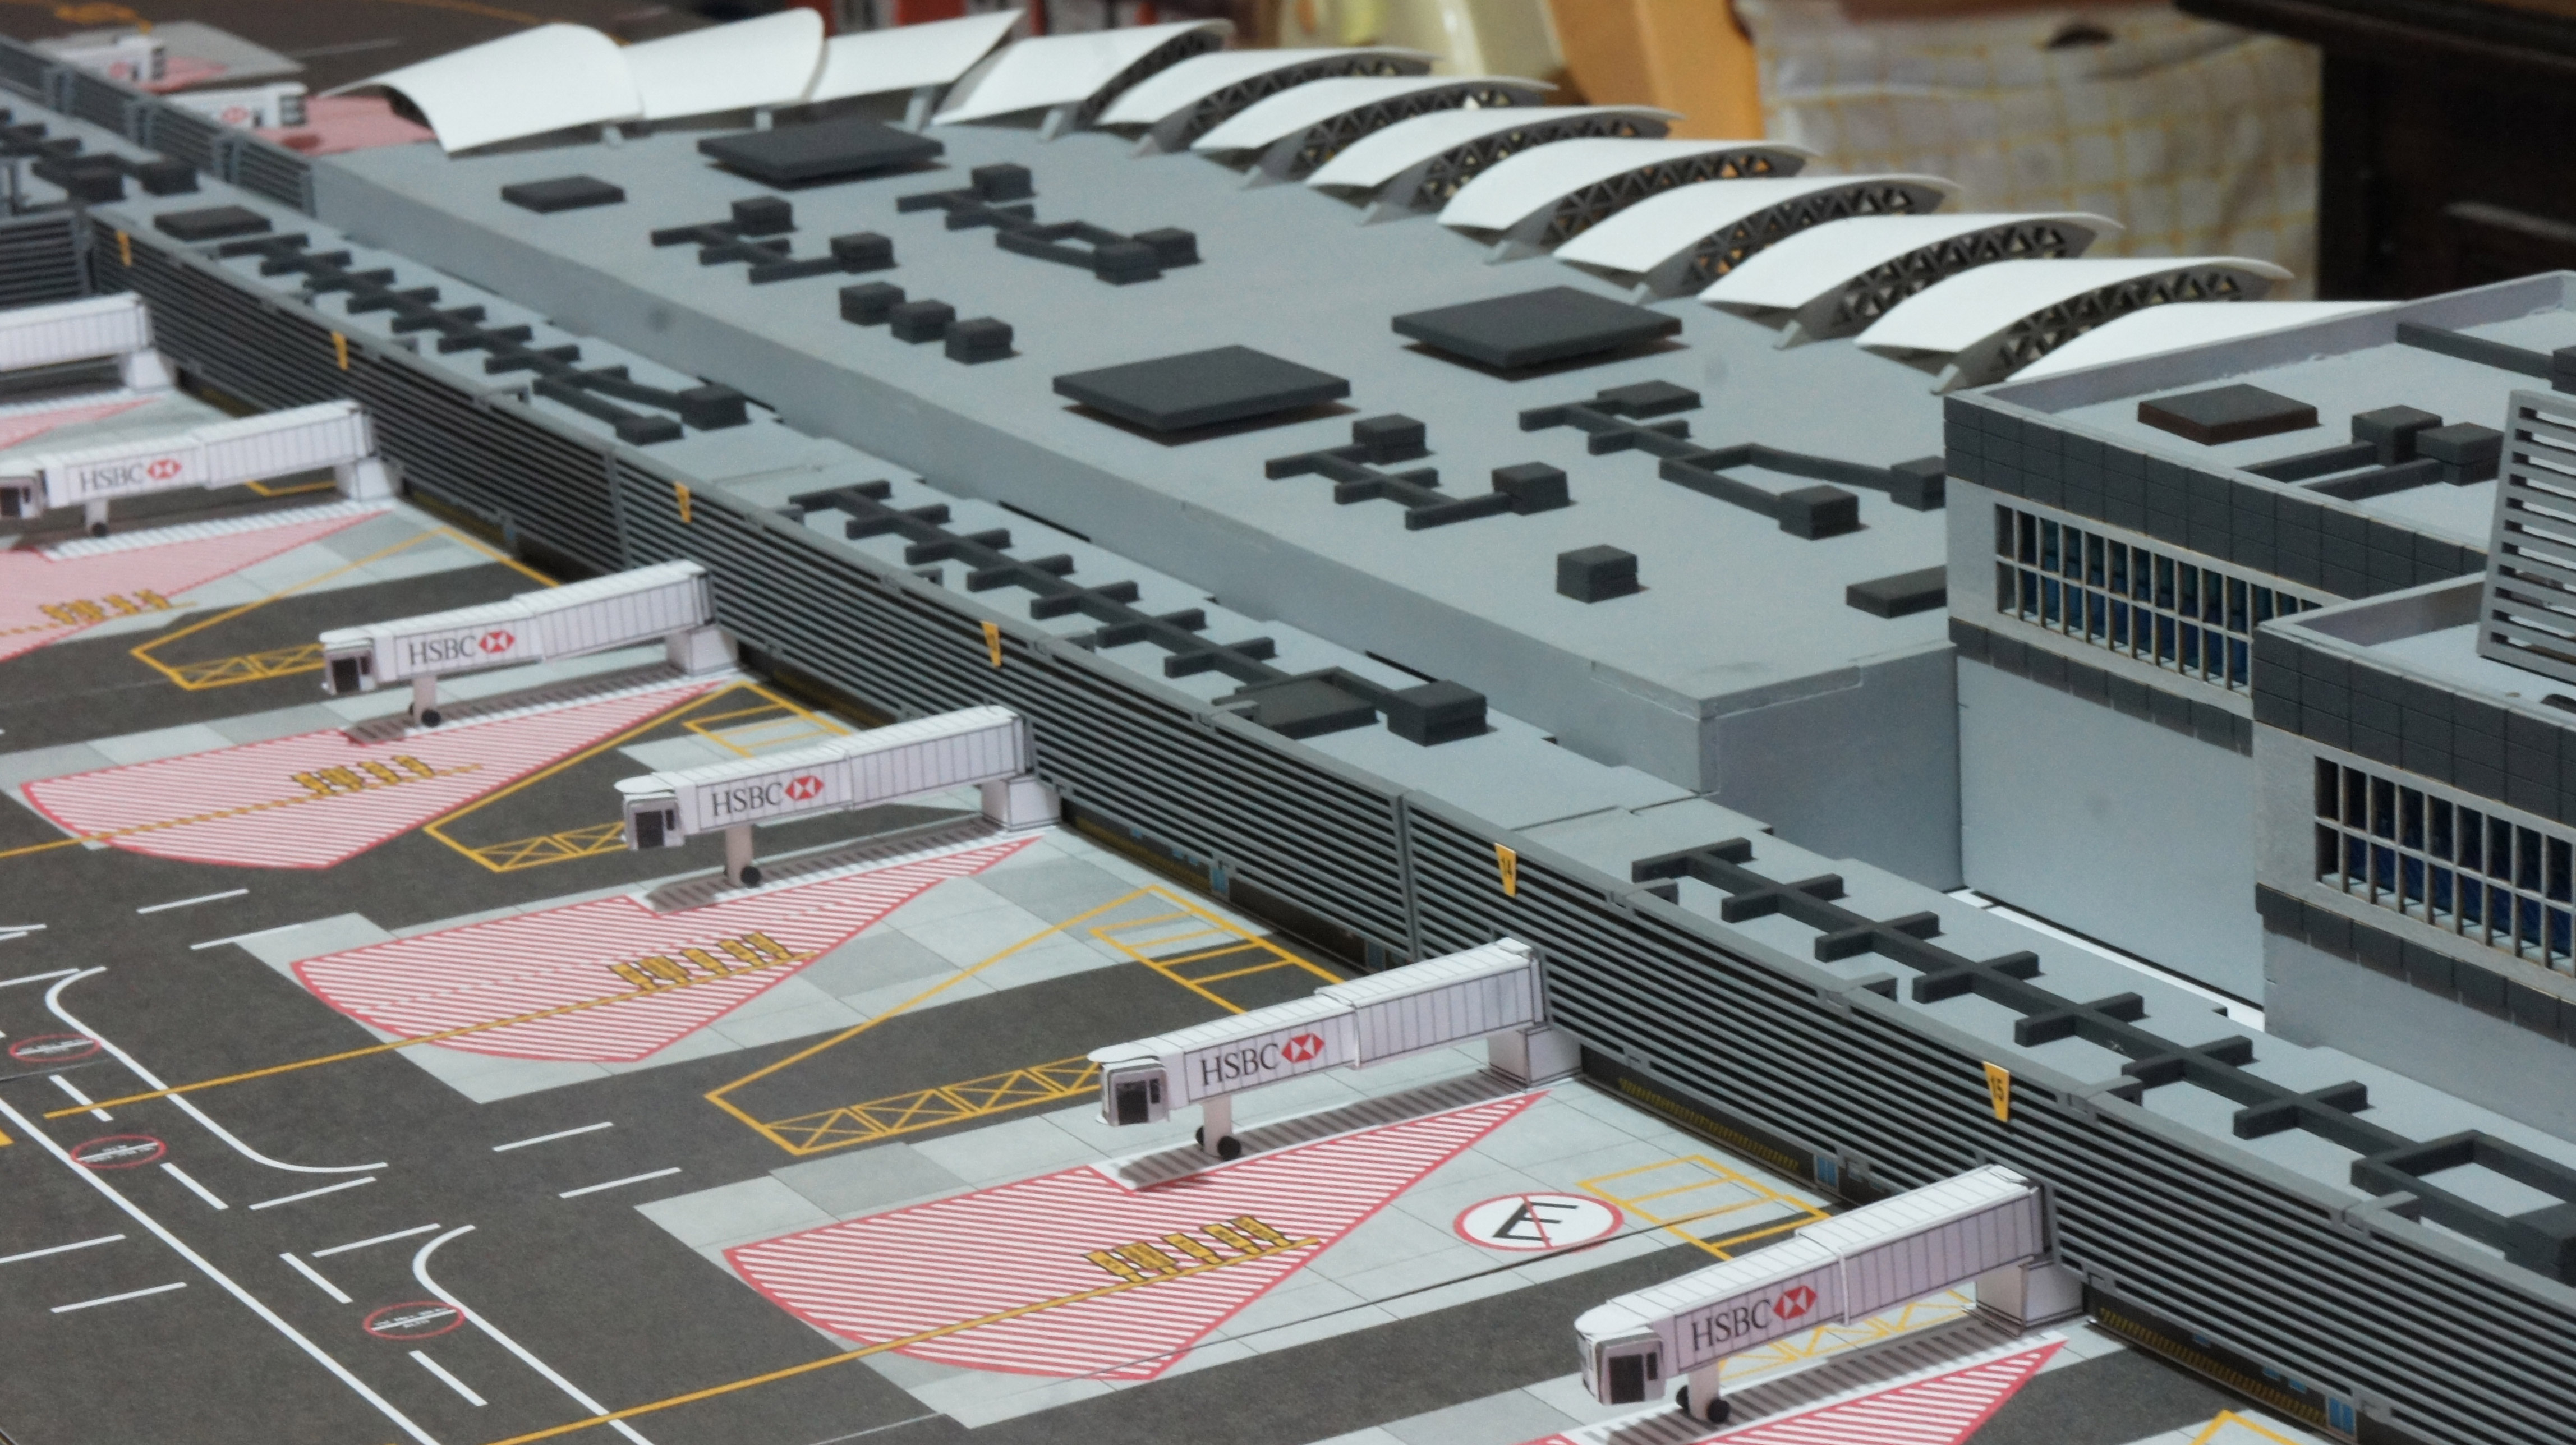
MAM: One of the most fascinating things I noticed about your airport are the realistic gates. Can you give us an insight on how you developed and installed these?
DD: Thank you, the doors as well as the rest of the airport design were created using Adobe Illustrator and Studio 3D Max. 220 gram paper was used along with, white glue, while the HSBC logos were added to replicate the actual gates found at Mexico City International Airport. The gate coordinates coincide perfectly in the positions of the model since they were made with exact measurements.
MAM: How did you create the airport mat for your diorama?
DD: For the design and development of the mats, we used carpet satellite photographs for reference, which allowed us to calculate the area destined for the structures, shooting area and tracks. Lines and signs were drawn as they appeared in the photographs, and green areas and pavement were cut to the maximum. We tried to make the mat look authentic. Finally, we printed the mat on a sheet of 200 gram photo paper using a color chart plotter.
MAM: Are there any future expansion plans for the airport?
DD: The photos featured in the article represent Phase 1 of the airport layout. Phase 2 calls for the addition of Gates 19 through 32. We also plan to add 7 more parking stands to simulate a cargo and customs area. As far as long term plans, we would like to add a second terminal.
Want to be featured in our Airport Spotlight Series? Send a photo of your diorama to info@modelairliner.com