
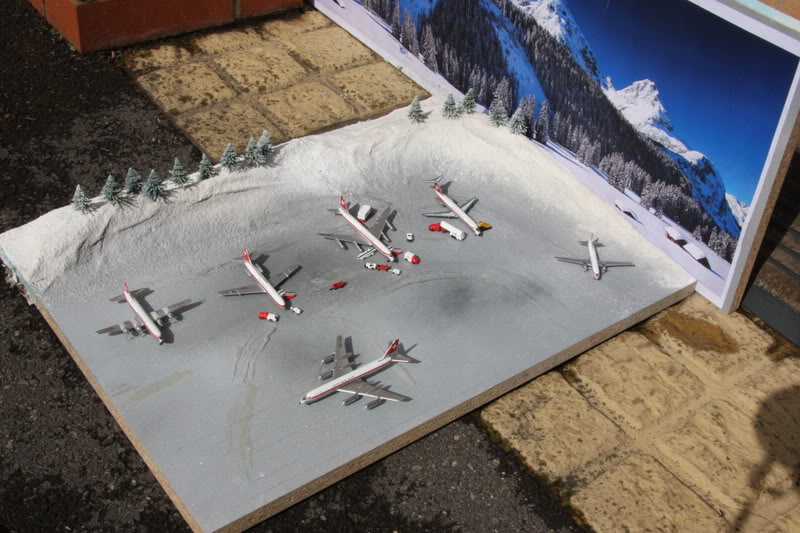
If space is at a premium for a full-sized model airport in 1/400 scale, then making a mini-diorama can be a great way to display your models and fun to do.
I have built 5 so far, all on 3ft X 2ft mdf boards and these are:
- A Small Winter Airport – suitable for a Canadian, Swiss, Austrian, Russian, Scandinavian scenario, or anywhere they have heavy snow falls.
- A Remote Desert Airport , suitable for a Middle Eastern or North African scene.
- A remote UK airport set in the Highlands of Scotland.
- An Exotic Caribbean or Hawaiian airport scene.
- A Generic Small European airport.
For all these mini-dioramas, I used a length of white laminated MDF boards sold in do-it- yourself stores for shelving. The smooth lamination enables painting and adhesives to stick to it, which may be an issue with any rough material. Also your airport apron needs a smooth surface on which to position your models.
All scenes are populated with GSE from Aeroclassics and Gemini Jets, plus some white metal models.
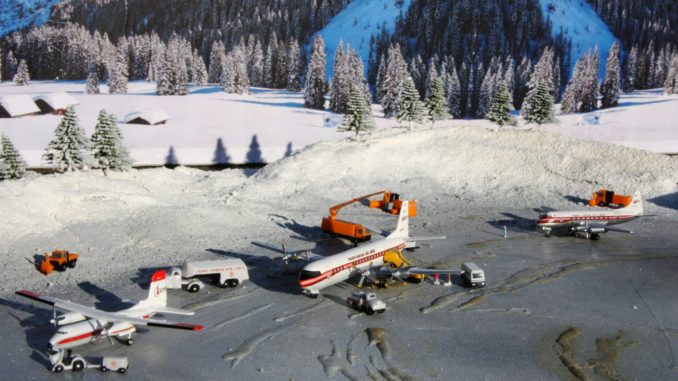
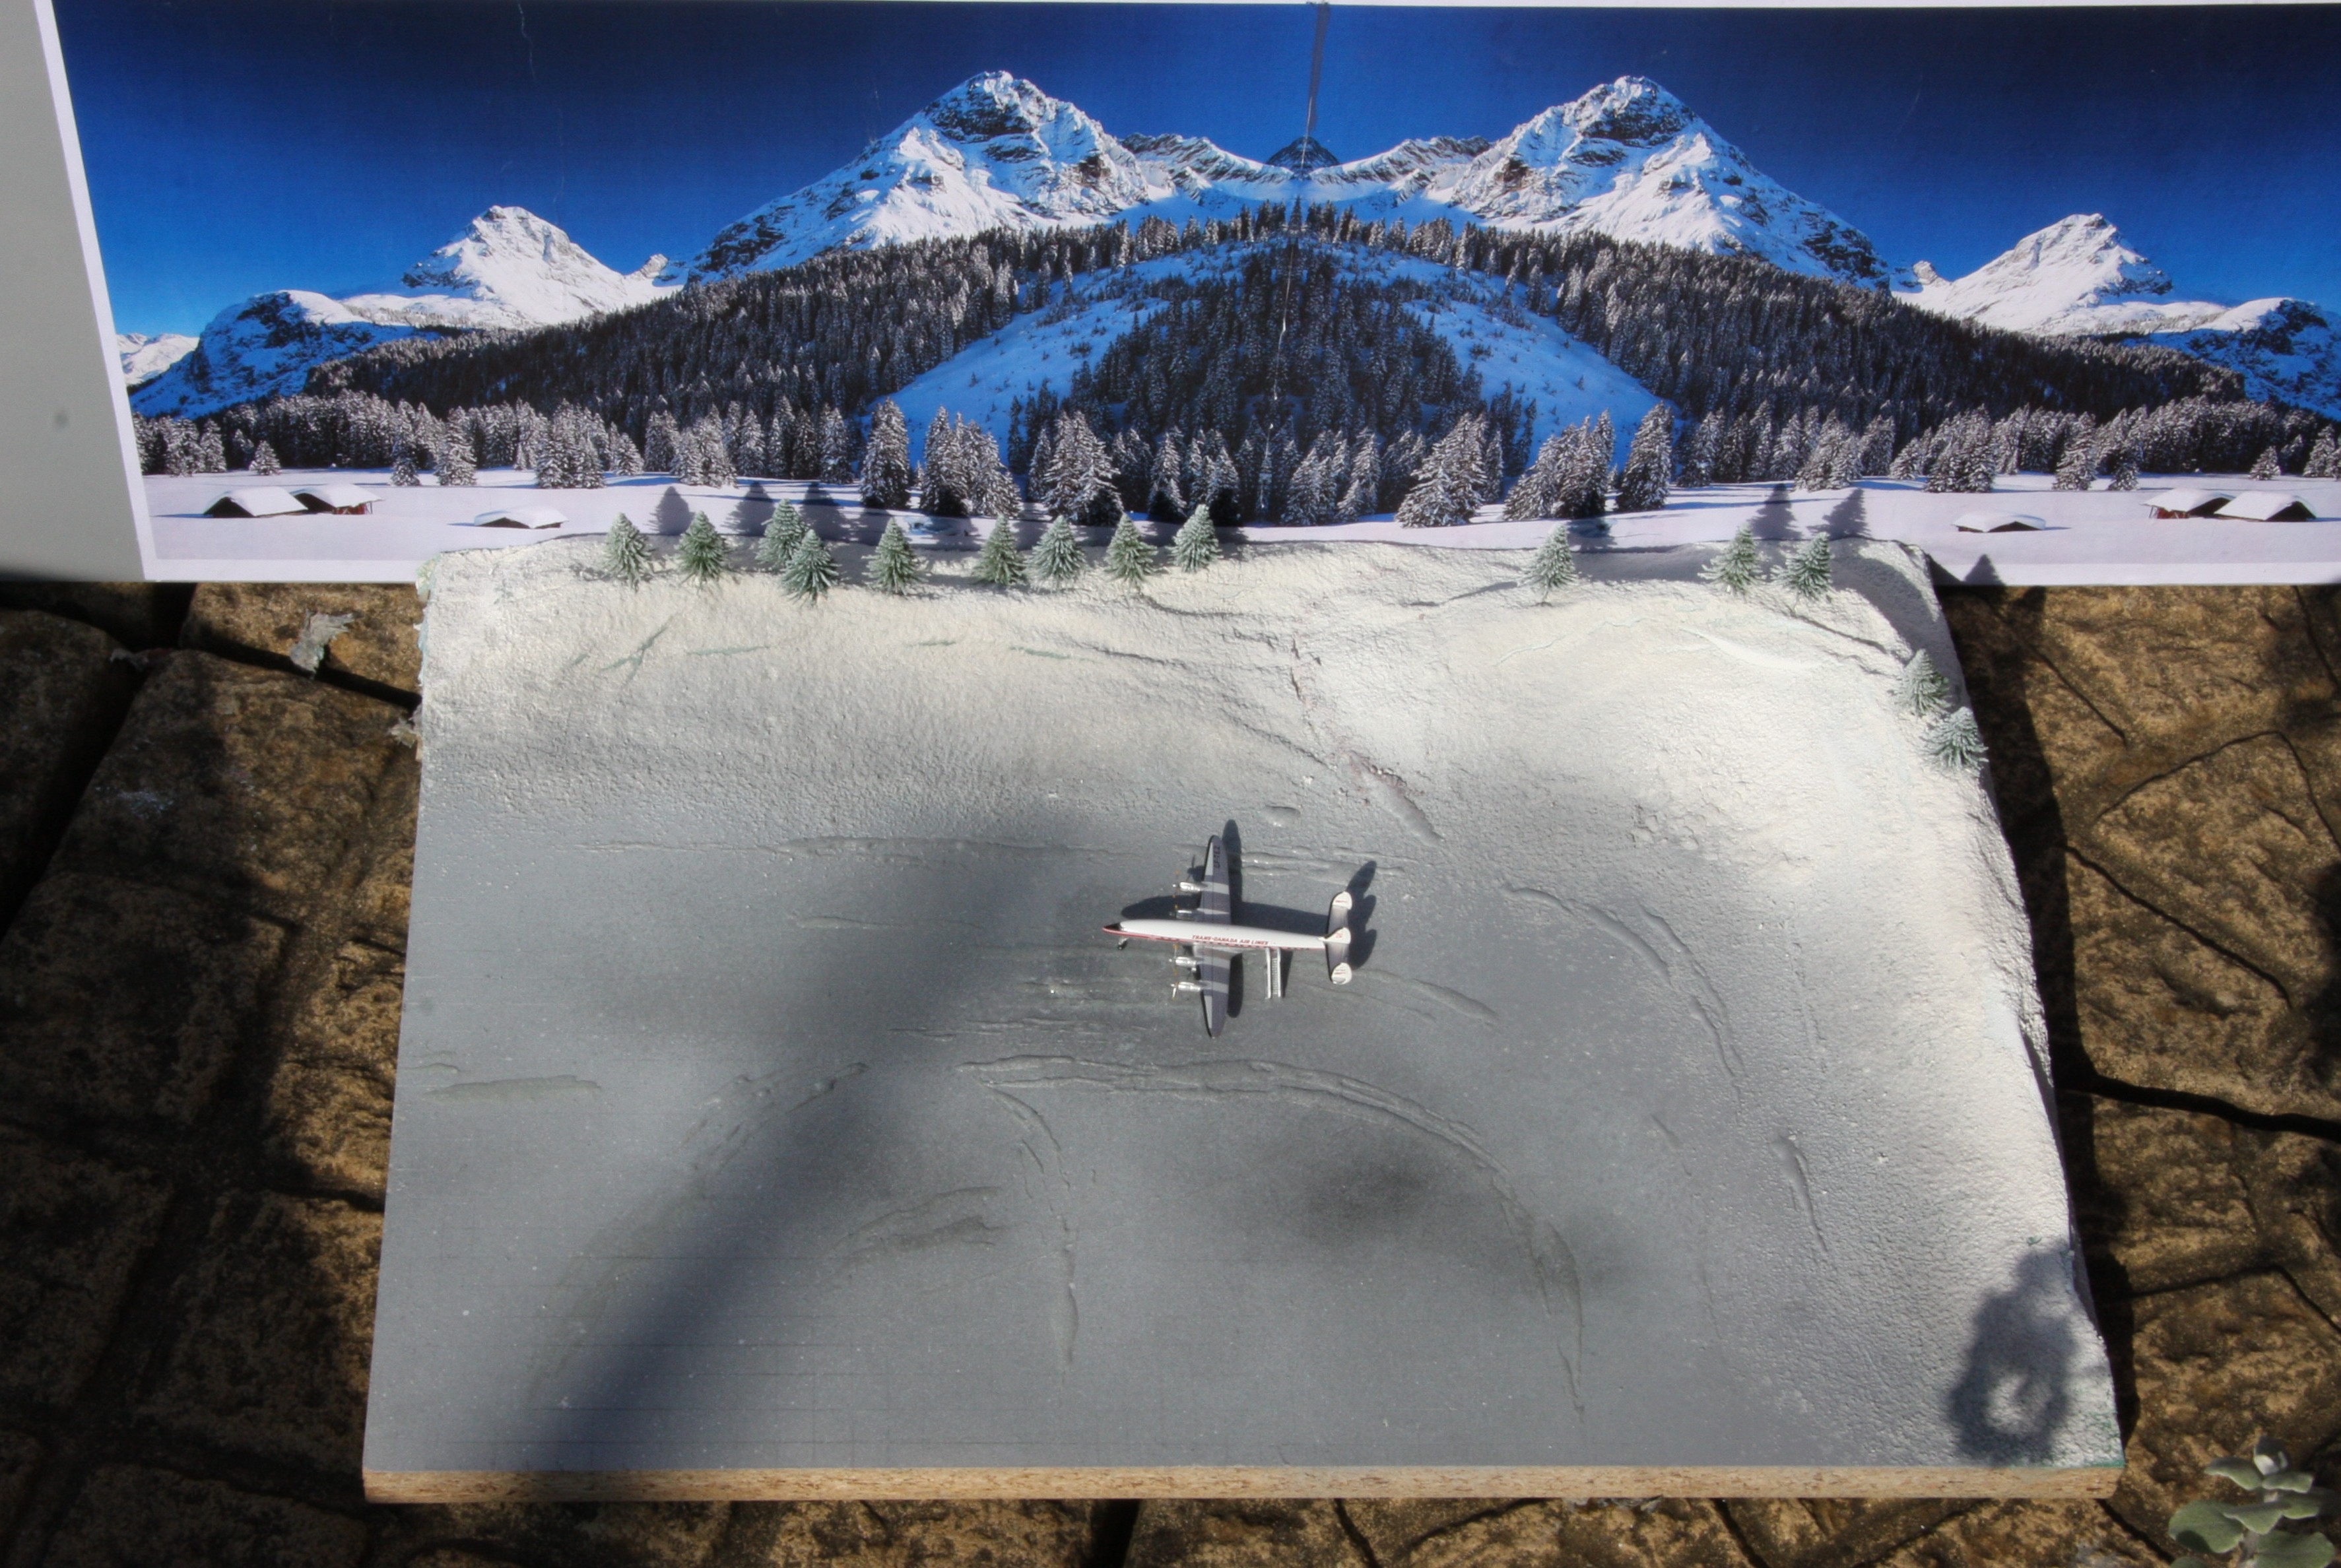
A Small Winter Airport
First spray the board in a matt medium grey colour, using an aerosol can, or airbrush. The colour should represent the tarmac or apron of your model. When dry, use a soft but sharp pencil and divide the painted area into small squares, approximately a 2cm square – these will give the apron a more realistic appearance of concrete sections.
Next make some papier-mâché by soaking some newspaper in mixed wallpaper paste, then squeezing it out and gradually build up what will become banks of snow around two sides of your board. This is important, as it will hide the edges of the background scene. Smooth down your papier-mâché ‘snow banks’, blending them into the base and on to the apron. When dry, carefully mask off the apron with newspaper and spray your ‘snow banks’ with a gloss dark green paint aerosol.
Before this dries, get some white internal wall filler powder and with a fine sive, sift the powder over the freshly painted areas, until you cannot see any green. Keep sifting until you have completely covered it with the white powder. The reason for the green paint is the white filler powder will stick to the papier-mâché banks you have created, without the need for additional adhesive. Also, if any falls off, or wears away, it will show a little green ‘grass’ underneath. The wet paint will also harden the white powder filler, making the banks becoming firm. With your grey aerosol paint can, then lightly blend in where the white filler powder reaches the apron – this will give the appearance of wet snow, as presumably the airport staff have salted the apron and thus the edges will have melted! I used a two-part tubes of mixed resin epoxy and applied small ridges on to the apron. When dry, this turns brown and gives the appearance of ‘muddy slush’ churned up by taxiing aircraft!
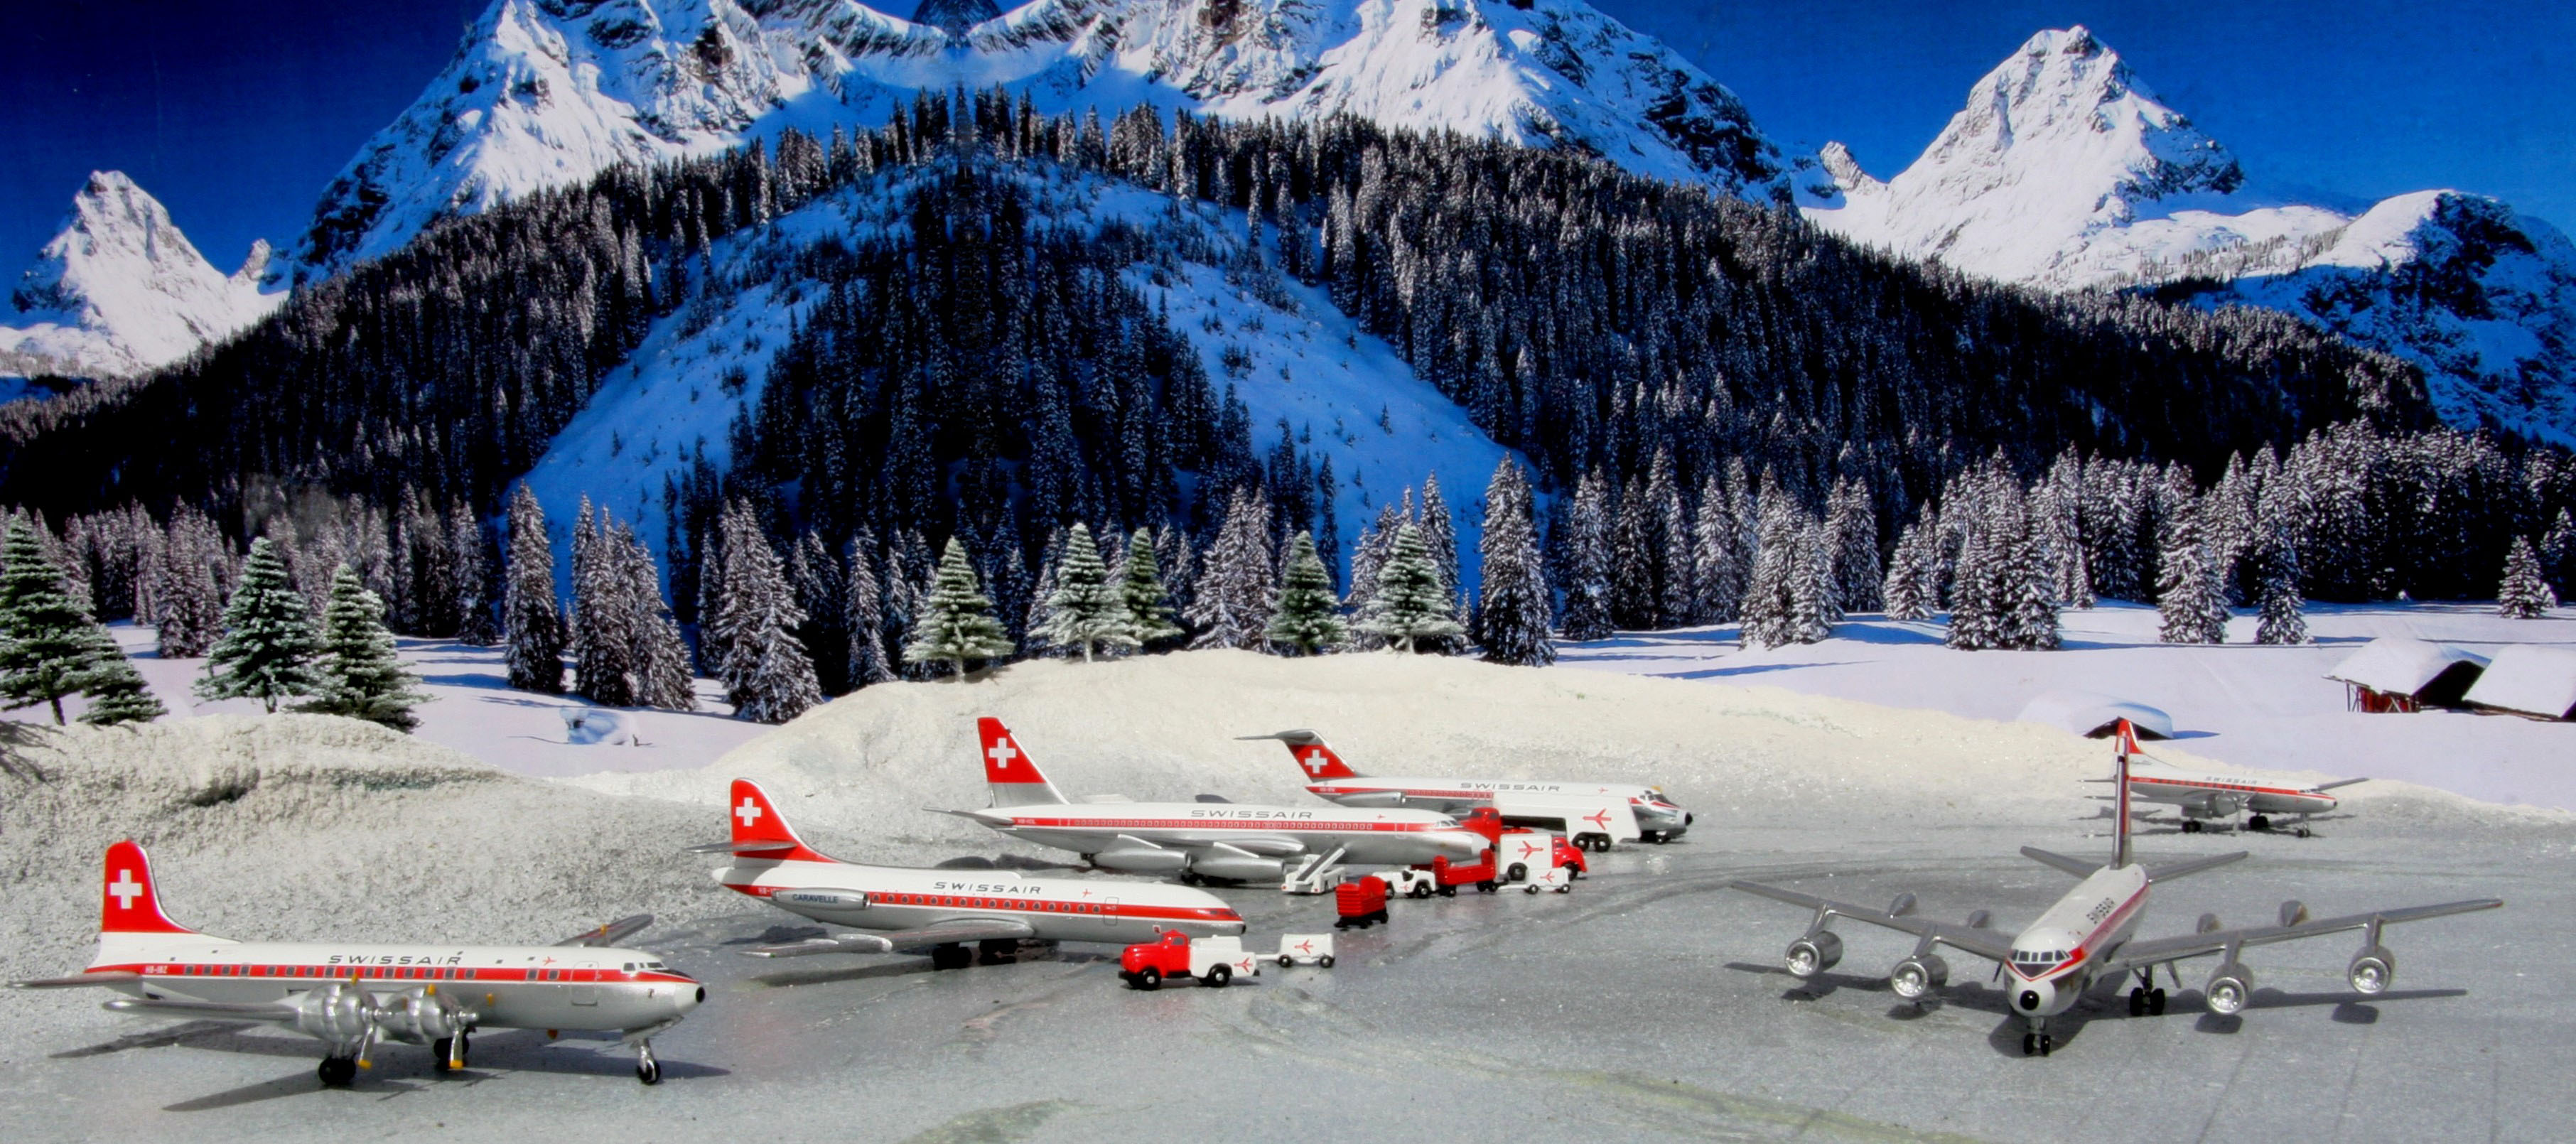
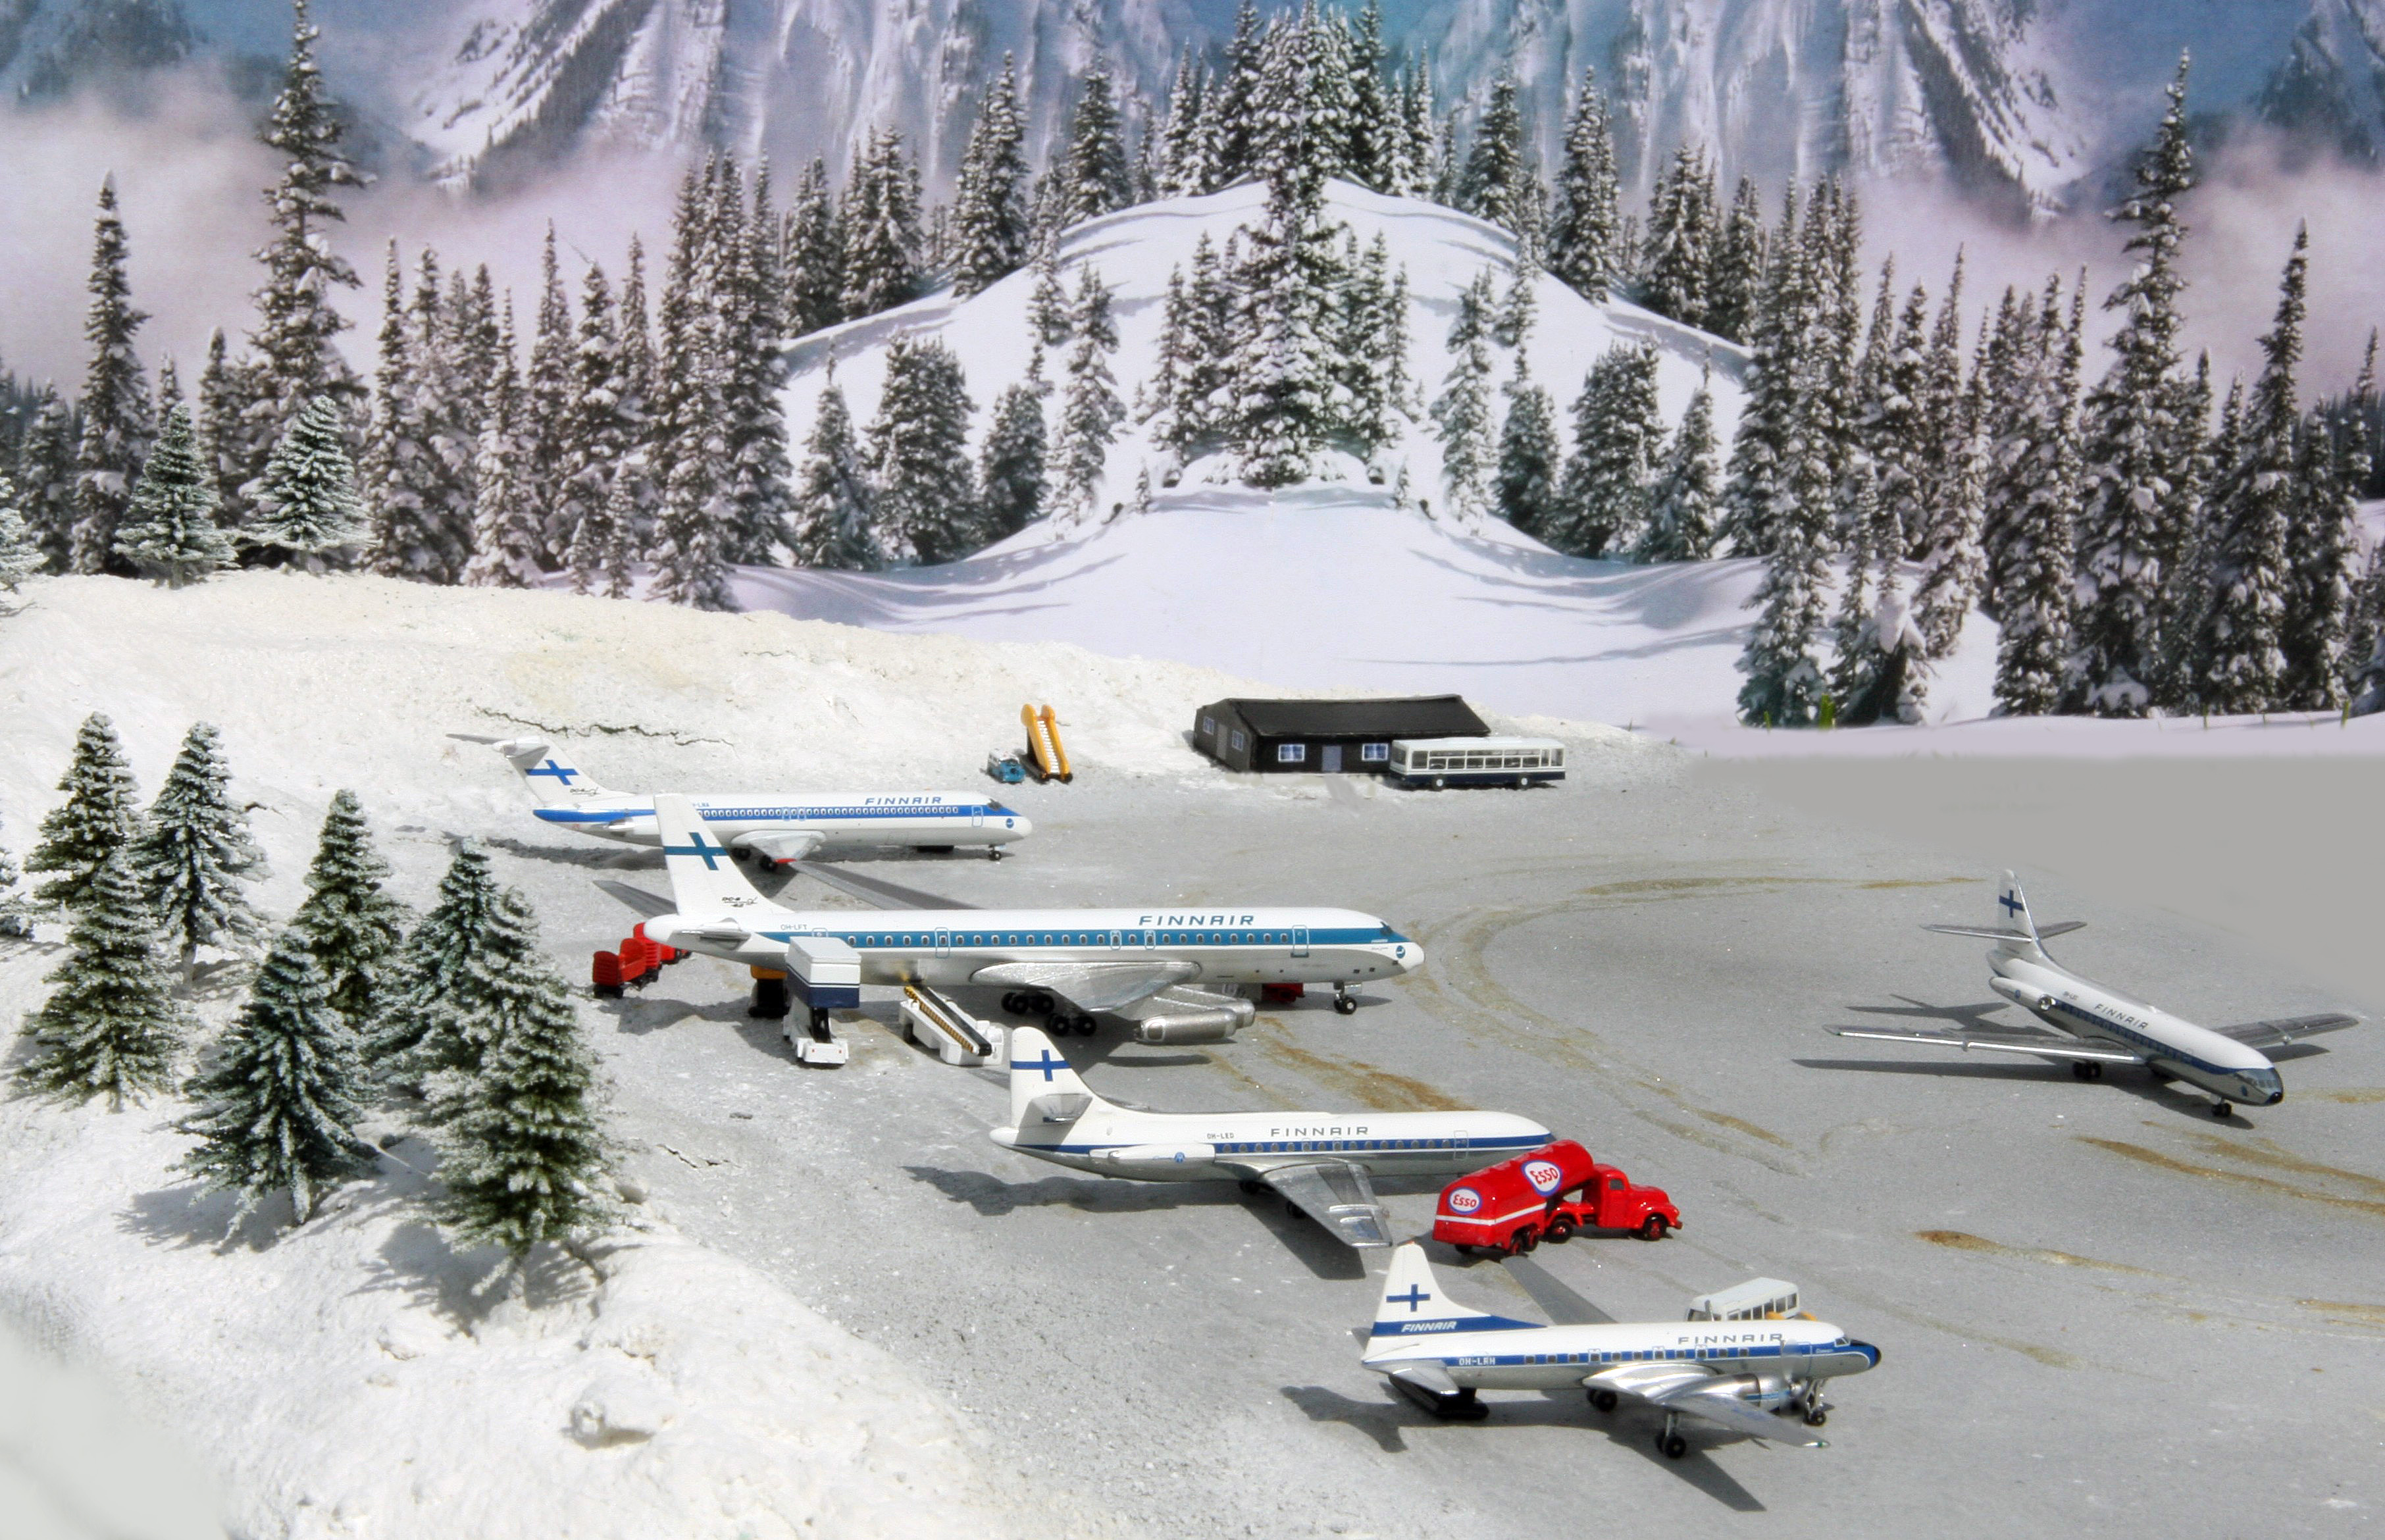
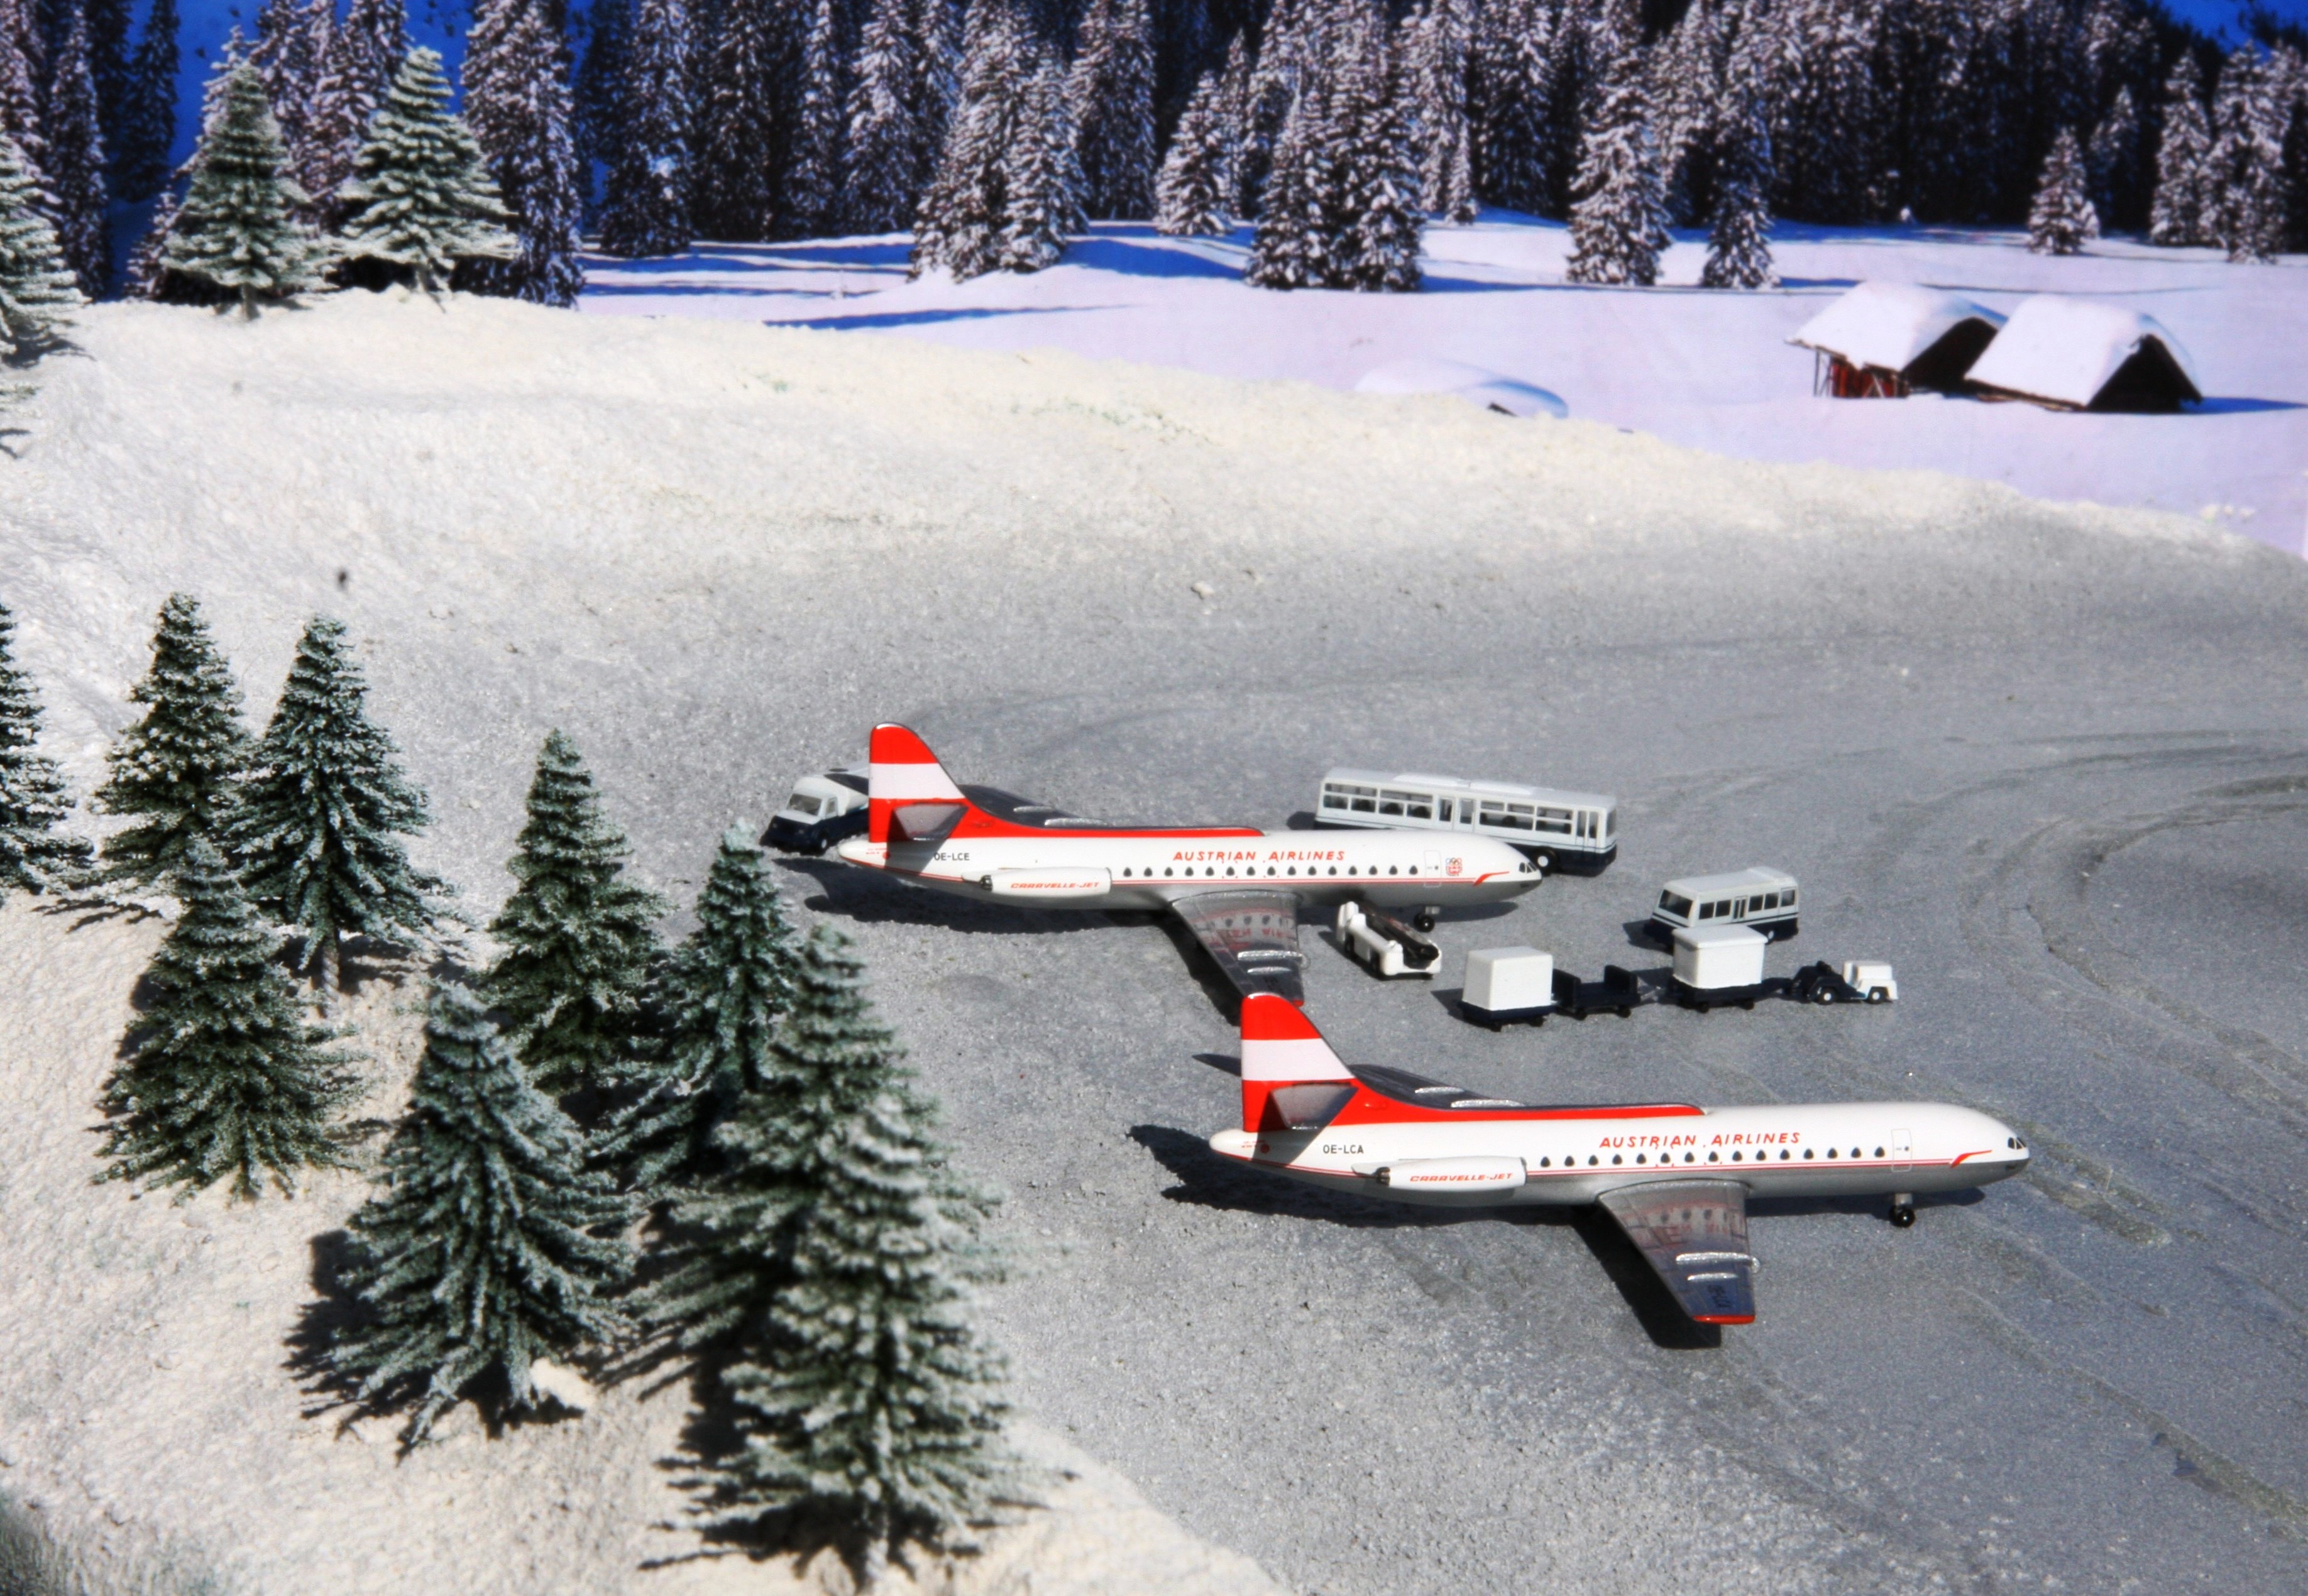
From a cake decorating shop, I purchased a number of small fir trees, suitable for 1/400 scale and pushed them into the tops of the snow banks, then sifted more of that white internal filler powder on them. The background is another mdf board on to which is pasted any suitable winter mountain view found online, being printed off on a colour printer on stock printer paper and joined together. You may need to make several prints to fill your board, putting some back-to-back for variation of the background scene. The background board needs to be longer than the model, as you may wish to photograph the model from different angles and you will need plenty of background to avoid seeing what’s behind it.
Then you can place a few small buildings and huts on the model, apron lights and finally your appropriate models and GSE, ready for a freezing cold winter turnaround.
A Remote Desert Airport
I used this and adapted it for use by Middle Eastern airlines such as Egyptair, Iran Air, MEA, North African airlines models any anywhere that has desert airfields .
You start with the same 3ft X 2ft white laminated board, sprayed grey as before and mark the square concrete slabs out as before.
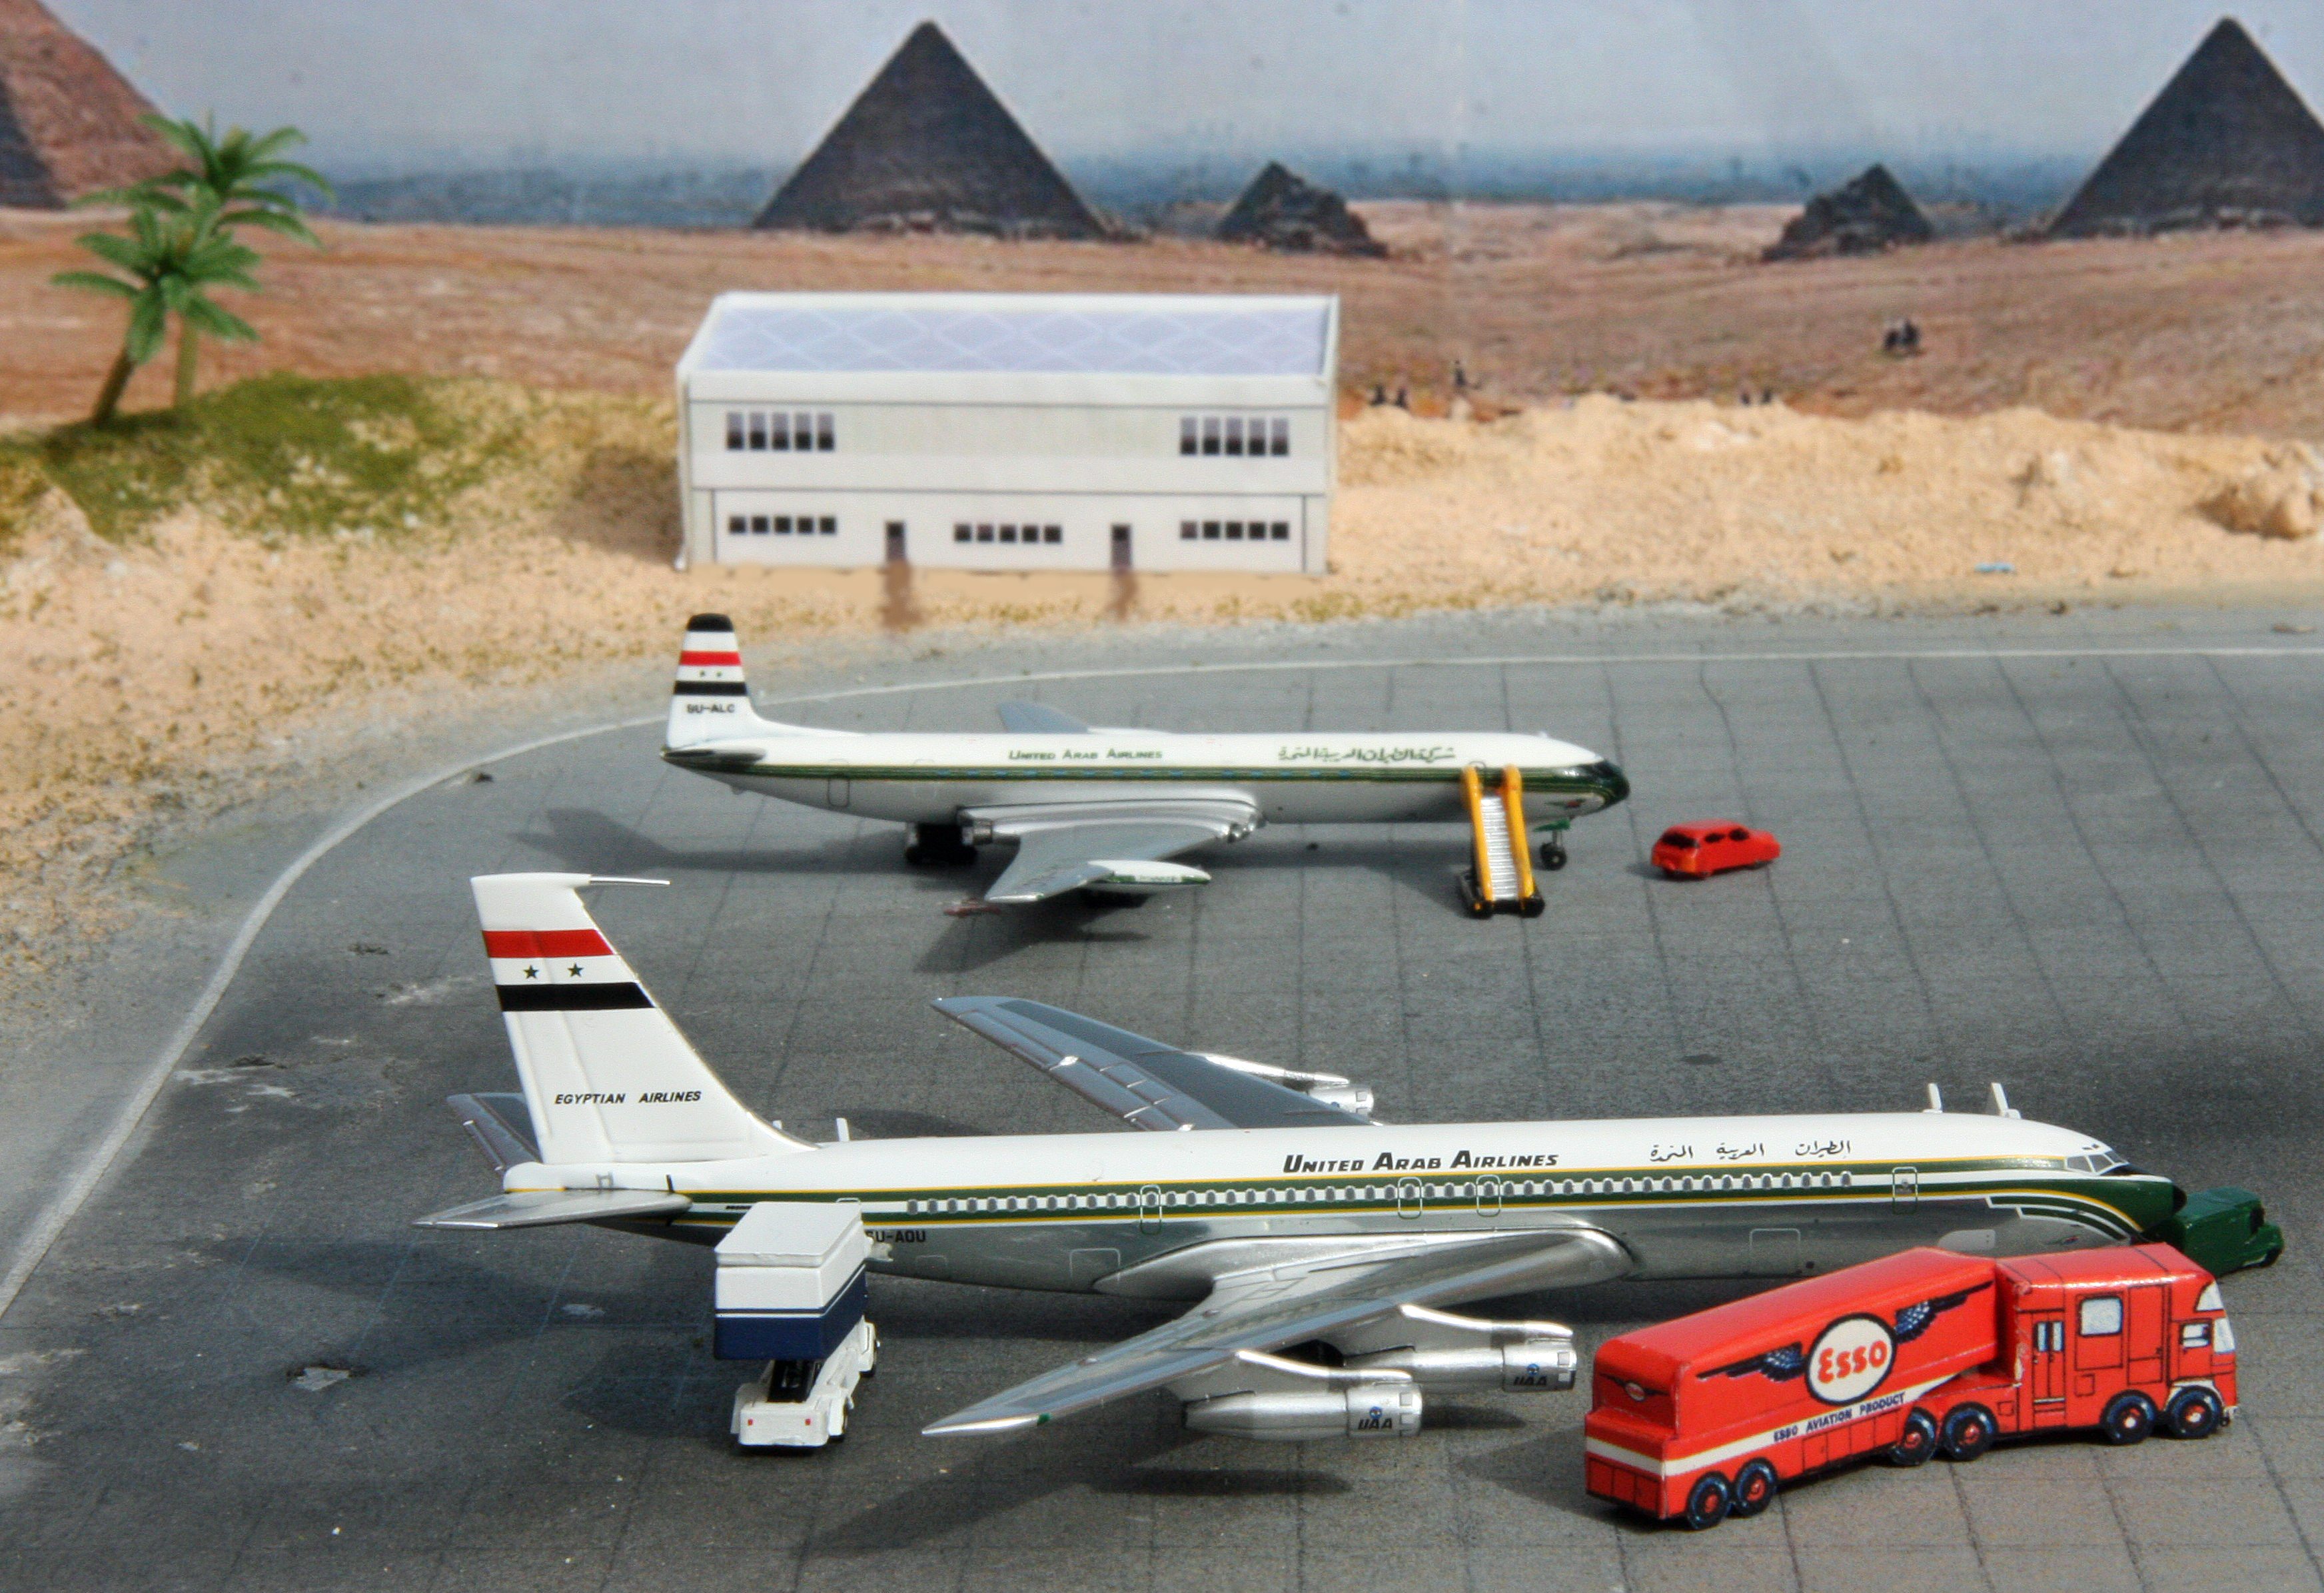
This time, instead of making papier-mâché banks, spray the edges of two sides of the board with water and immediately sift the white internal filler powder onto the wet areas. As it hardens, spray the model with water, followed by more filler powder sifted on top, so you build up your sand dunes around the edges of the board. When you are satisfied with the height and finish, let it dry completely . Then get a matt sand-coloured aerosol paint can and spray over the white ‘dunes’ until they are completely covered and take on the appearance of sand. Mark out the edge of the apron with very thin white masking tape (so the pilots keep clear of the loose sand when taxiing!). Obtain a few small plastic palm trees, again from the cake decorating shop, or I found some very good ones from China on a well-know auction site! Push these into your sand dunes on the edges of your board. Again, the background board was adorned with a desert scene from the ‘net, or you can just have it as a plain blue sky,painted or printed. I found an Egyptian photo with pyramids, which I used as ‘ an airfield near Cairo’! Then you are ready for your middle eastern turnaround….but watch out for straying camels on the apron !
An Airfield in the Scottish Highlands & Islands
With a background photo of Islay airfield in the Hebridges, Scotland, I sprayed my 3ft X 2ft board dark tarmac grey and built up some grass banks using the same papier-mâché method, sprayed with a gloss dark green aerosol can, then sprinkled with Woodlands Scenics ‘grass’ powder. A small etched brass fence was obtained from a dealer selling it as ‘railings for 1/400 ships’ and painted white. Add a couple of small model trees and a couple of small scratch-buildings and there you have an airfield suitable for twin-props like the DC-3, Herald or Fokker Friendship etc.

An Exotic Caribbean or Hawaiian airfield
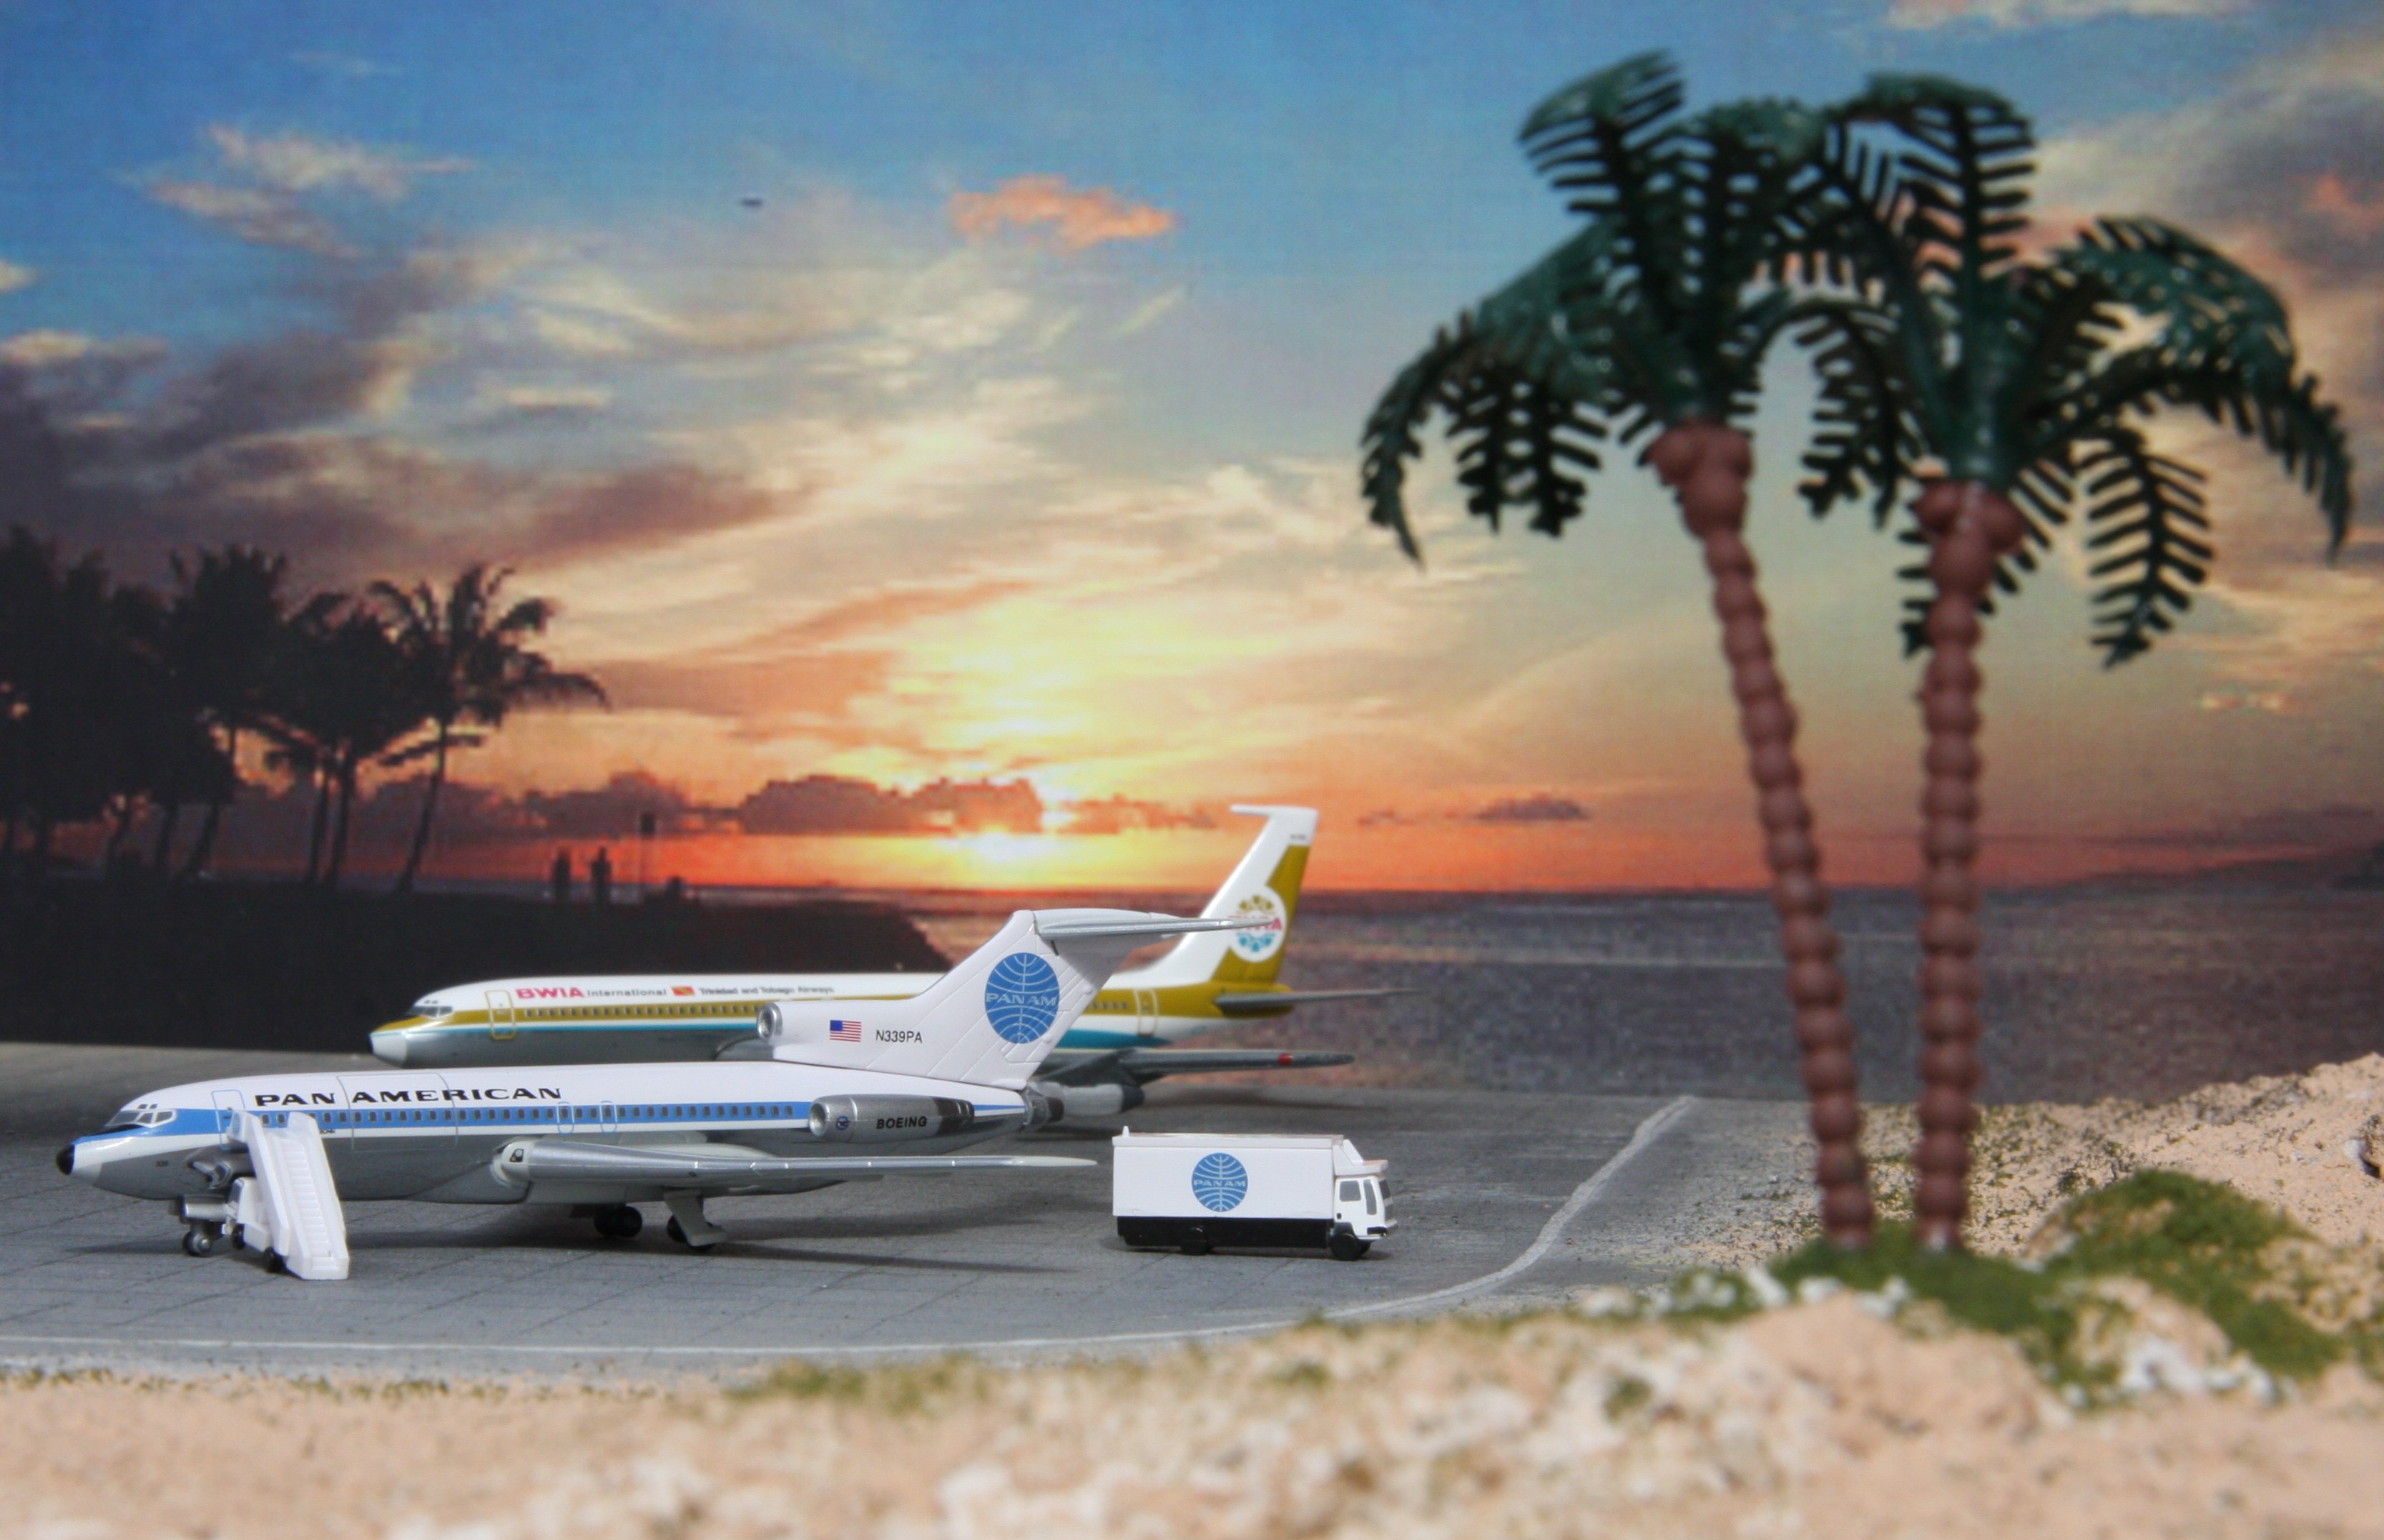
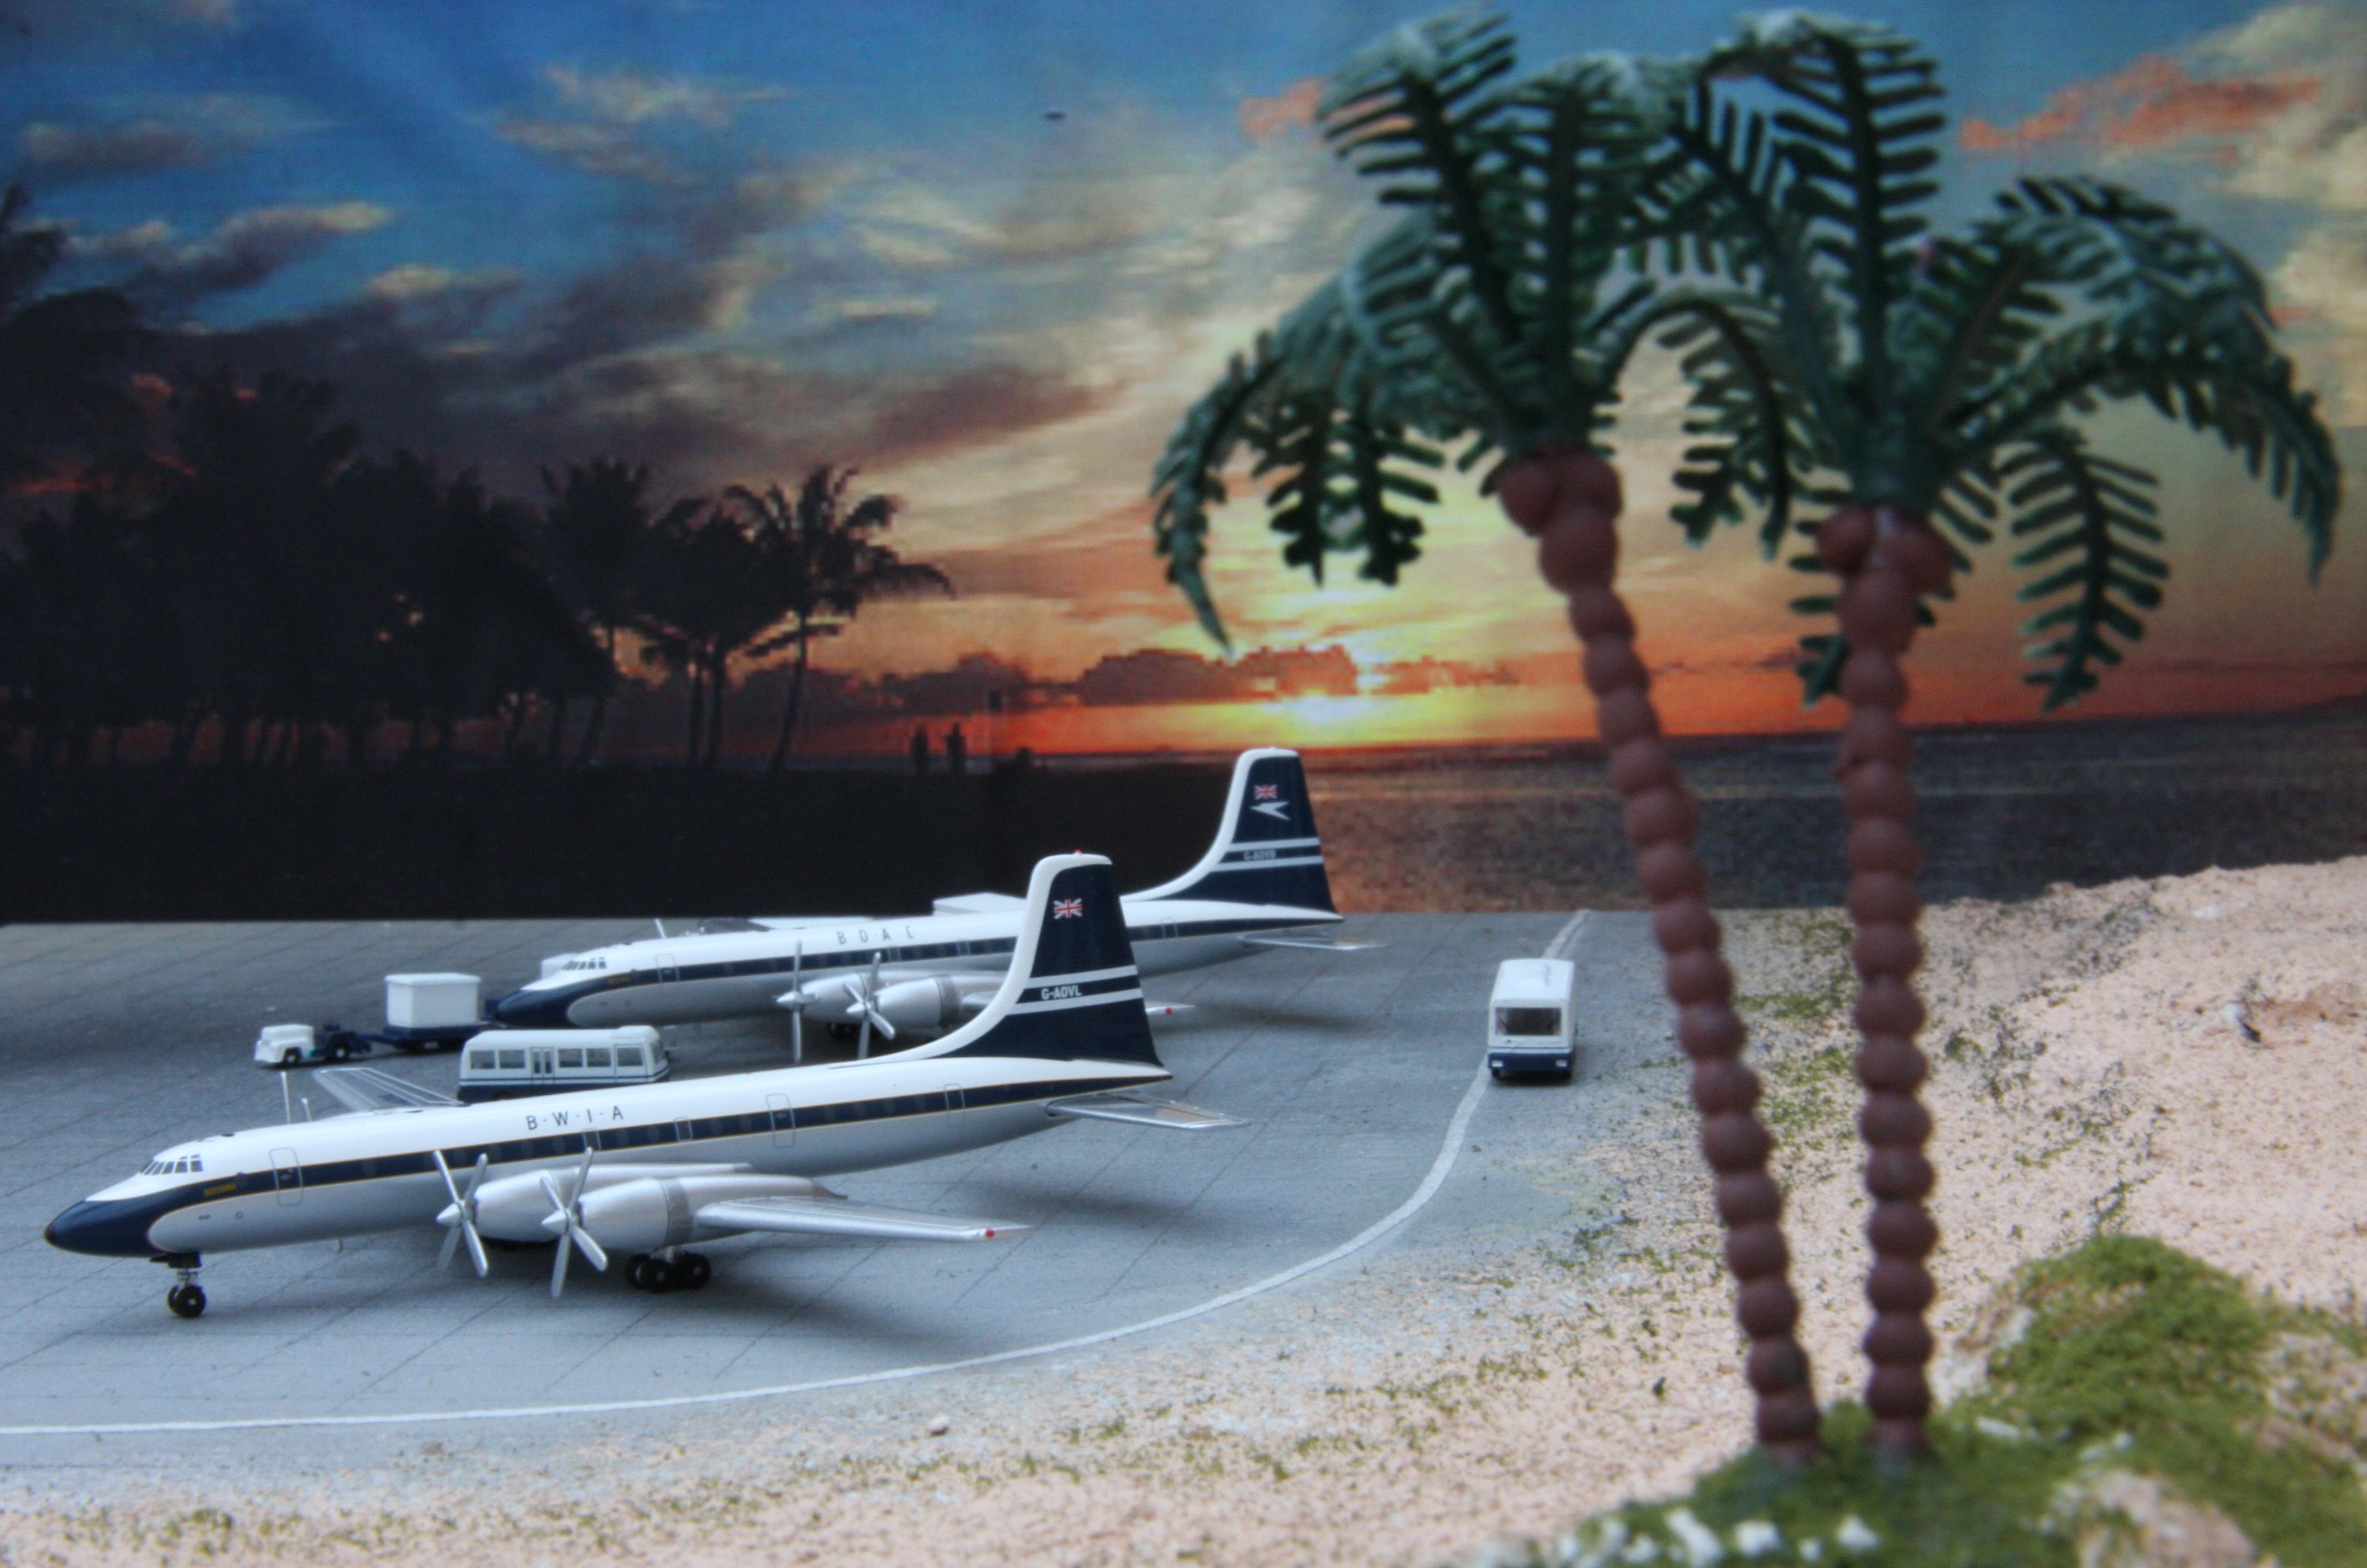
Your remote desert airfield board can be adapted for this, with the sand edges and palm trees. Mark out the taxiway with very thin (2mm) white masking tape (made by Tamiya) and find a lovely background photo on the net, showing a setting sun in the location you are modelling. Print this out with a colour printer on to ordinary copying paper (A3 size if you have access to a printer that takes this size paper) and paste it on to your back-board. With appropriate models added, you will soon feel the warm air of the Caribbean….especially if you use a hair dryer to make those props turn!
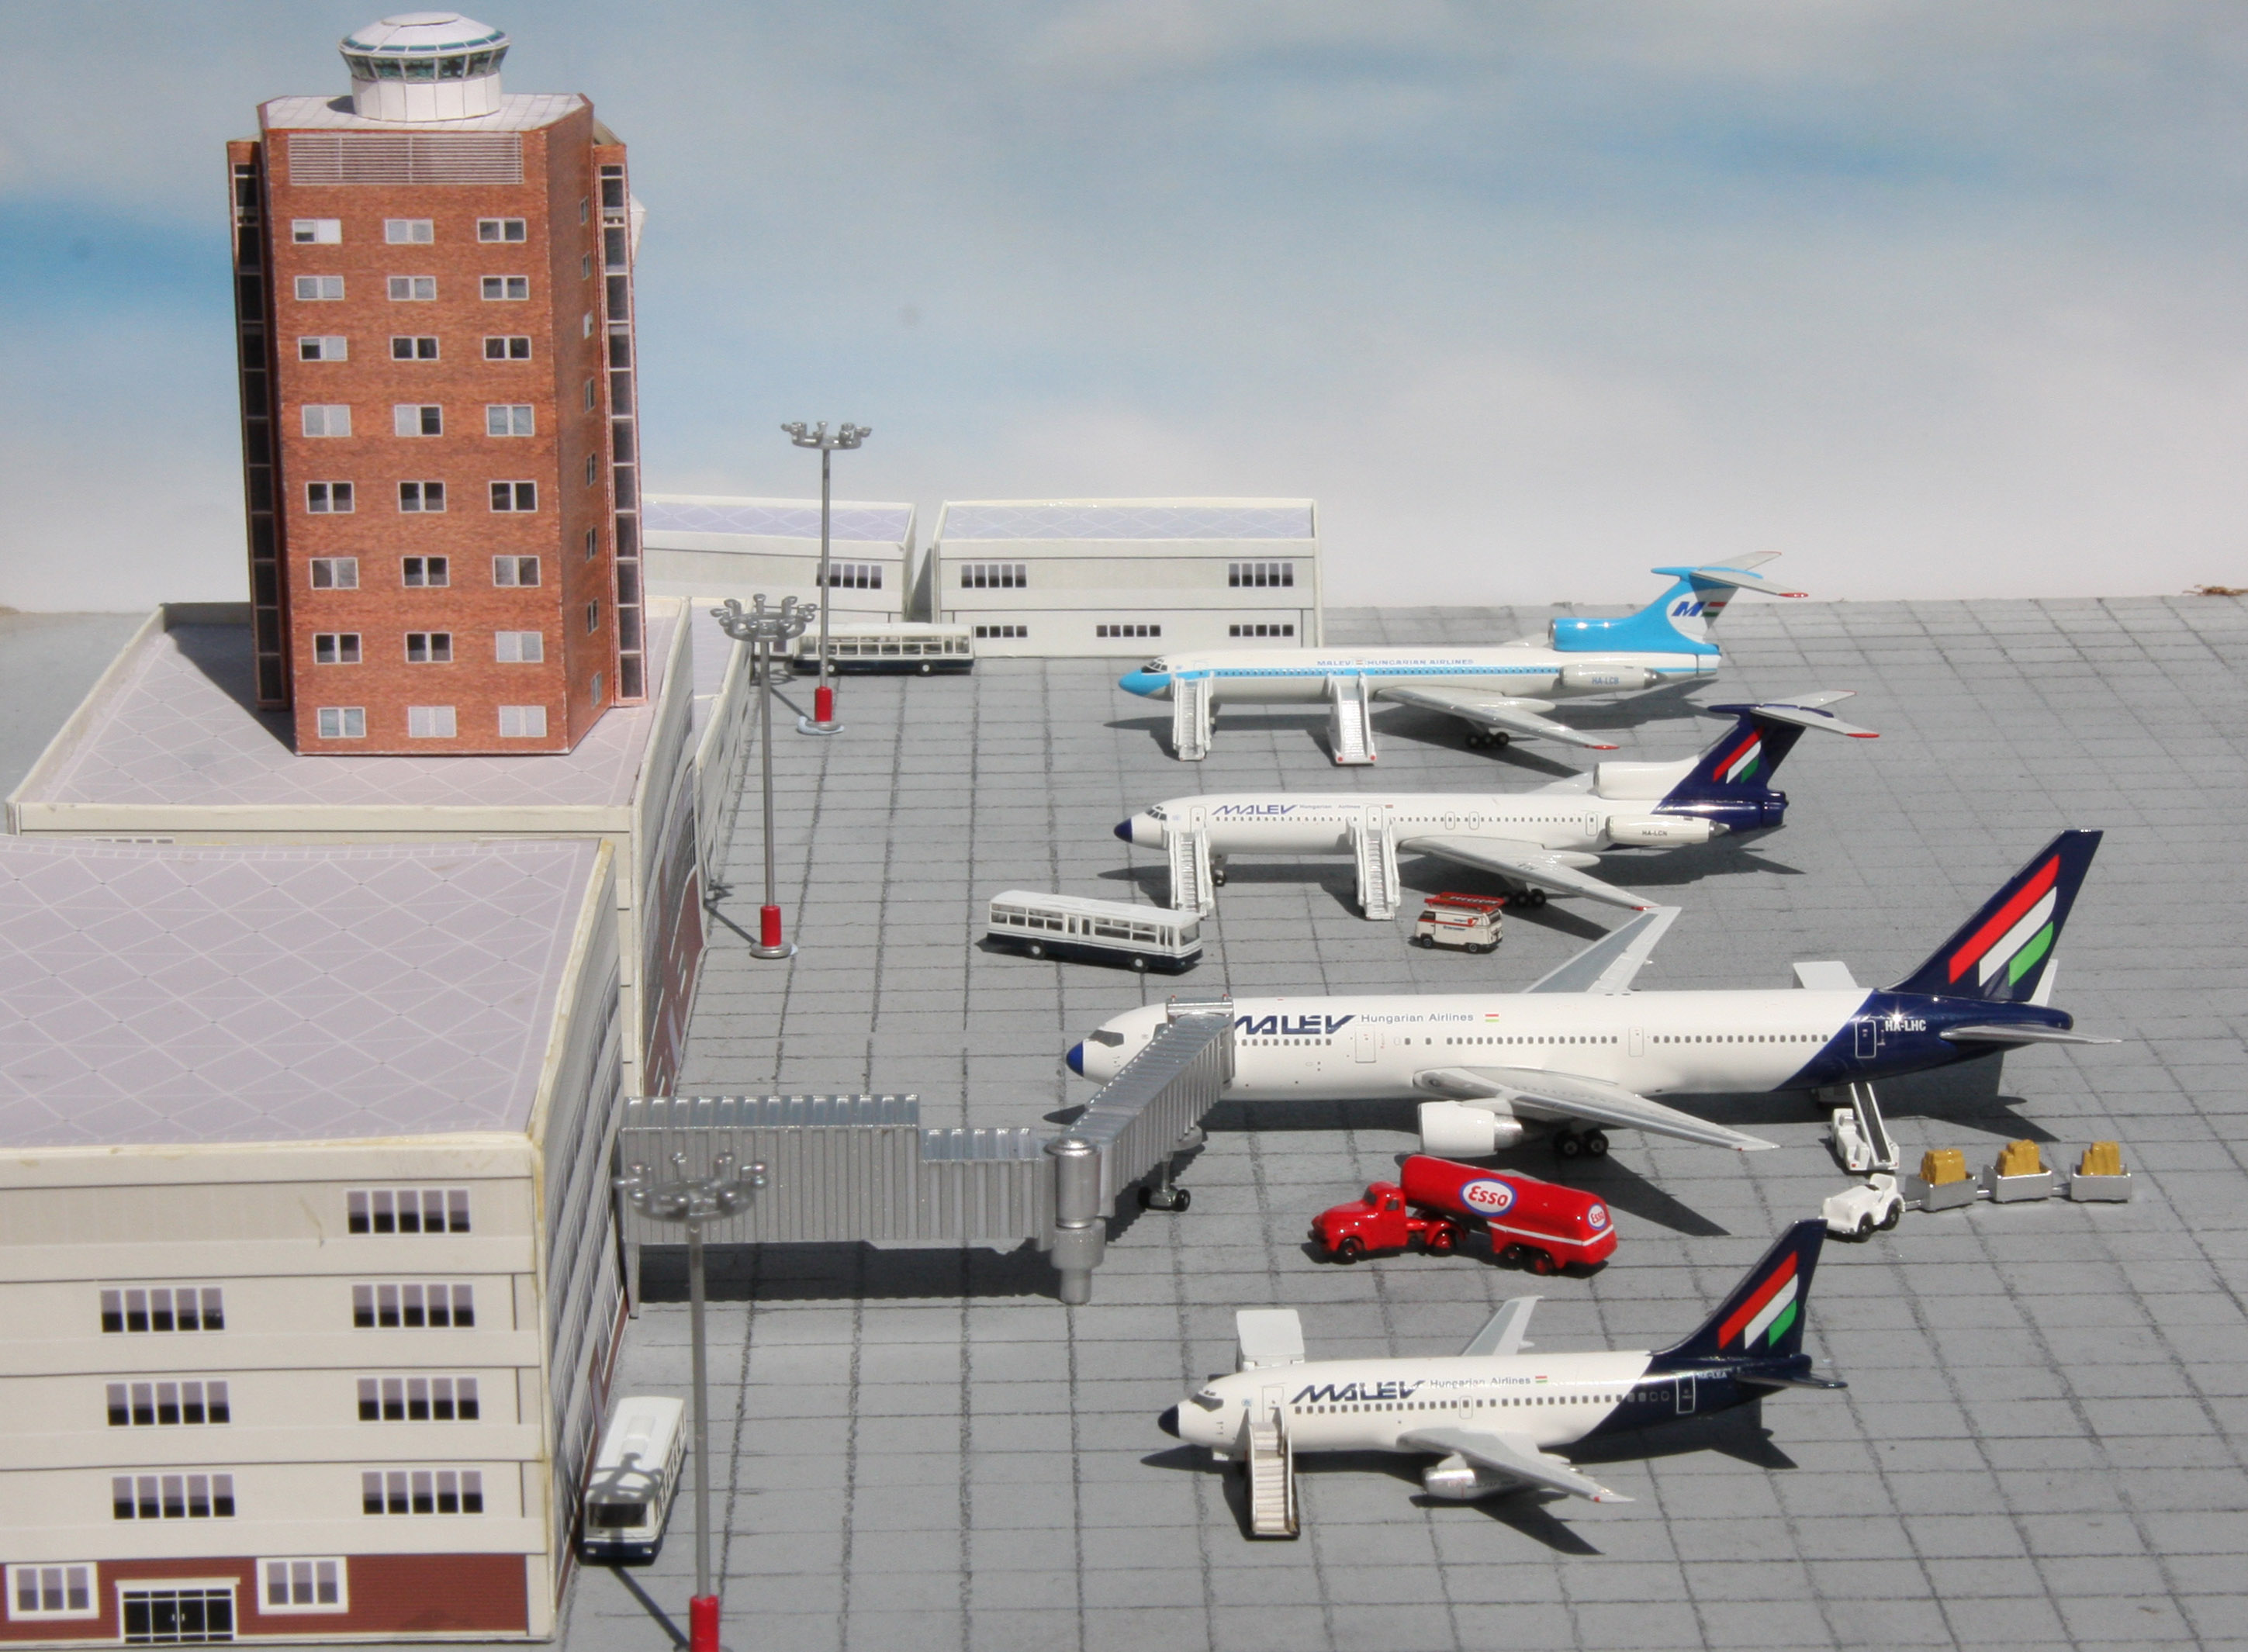
A Generic Small European Airport
Paint your 3ft X 2ft board in ‘concrete grey’ and mark out 1 cm square using a ruler and soft pencil, to represent concrete slabs. Of course you can also use any ready-made mat for this. No grass this time, but place some kit-built or scratch-built terminal buildings along the edge in a way that they hide the background scenic board, which can be just sky coloured or with some distant hills as required. Use a combination of commercially-available Jetways and some GSE stairs, to cater for all types of airliners that may visit your airport.
Photographing the Models
Wait for a bright sunny day, with little or no wind and take your model outside or in a room where the sun shines in. With your back to the sun,place it on a table, or get as low down as possible (lie on your belly!). Place the camera on a tripod and compose your picture, ensuring only parts of the model are in view. Use as high an F-stop (smallest aperature) as possible to get a decent depth of field.
All I can say is WOW!!! Very well done indeed!!
Many thanks for that accolade from ‘the Master’. Now please can we have some Icelandair classics in the ‘Pegasus logo’ scheme for a winter Reykjavik scene? DC-4,DC-6, Viscount,F27 and B727-100? Also a reissue of the Loftleidir DC-6 on the ‘new’ DC-6 mould would be great?
Nice dioramas! I notest a Phyton refueller in the “remote desert airport”, that’s look to be made with a paper print. Where I can find one?
Thanks,
G_Mendes
Regret you can’t. This was made specially by a very talented collector in Spain, who no longer makes these.
Absolutly incredible! This sets high standards for all of us collectors out there. Very interesting and helpful article. Thanks